

|
General discussion regarding the techniques and methods used to successfully grow tomato plants in containers.
|
 |
|
|
Thread Tools | Display Modes |
|
|
#16 |
|
Tomatovillian™
Join Date: Apr 2009
Location: Illinois
Posts: 180
|
Thanks Kat. You are absolutely right, I will need to do something to prevent the plywood bottom from sagging under the weight of the water in the lower chamber. I was toying with the idea of a small block of wood right in the center, but a center brace might make more sense, as a small block could break off while moving the box.
I hadn't planned on casters. I'm pretty sure I won't be moving these containers while they are full. I only have a small area on my deck that gets any sun, so I think they will be there to stay. Also, I think my design might not have the strength to be up on wheels. |
|
|

|
|
|
#17 |
|
Tomatovillian™
Join Date: Jul 2008
Location: 6a - NE Tennessee
Posts: 4,538
|
Two equally spaced cross pieces added to your "bottom 2X2's" will be plenty strong enough to hold the water weight and prevent "bulging". You'll need another similar set of that same bracing inside at the top of the water level and again near the top of the soil level. The bracing at the top of the water level can also act as a support for whatever you are using as the bottom of the soil area.
I noticed that on the bottom, your 2X2's are in there with a "Butt" joint. You might consider using a "half-lap" with wooden pegs (dowels) for better strength and to ease some of the load on your "very nice" box joints in the plywood. Remember, this thing is going to swell out a bit when it goes outside into the humidity and rain and gets wet. Lowes sells some decorative flat wooden pieces like swirls and curls that can be glued or pin-nailed onto surfaces. They're usually in the Millwork Department. Don't know what glue you're using, but if it isn't epoxy based, then I'd recommend Titebond III (Green bottle) as it is "almost" waterproof when cured. Also, there's a couple of construction adhesives in "caulking" sized tubes that are waterproof when dry. LOOKIN' GOOOOOOOD SO FAR!!!!!! Ted
__________________
Ted ________________________ Owner & Sole Operator Of The Muddy Bucket Farm and Tomato Ranch |
|
|

|
|
|
#18 |
|
Tomatovillian™
Join Date: Apr 2009
Location: Illinois
Posts: 180
|
Ted -
I've been using Elmer's Interior/Exterior wood glue. Not sure if it will hold up, but it's what I had. I hope that the combination of the fasteners/glue will be enough. The bottom will be sitting flat on my deck, so in my case it is more of a support rather than structural - I think. So, here's today's progress: I finished the trim on the outside: 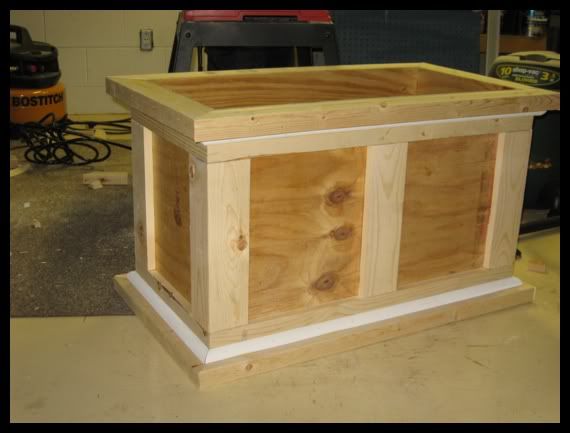 Then I added the plywood bottom: 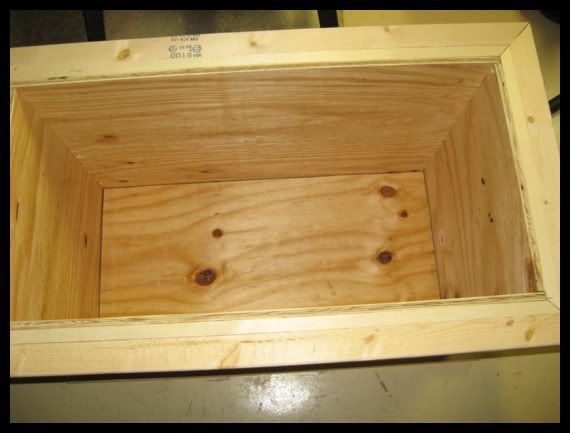 I decided on a 2x4 for center support on the bottom. I think it will bear the weight on a flat surface without really being part of the structure. 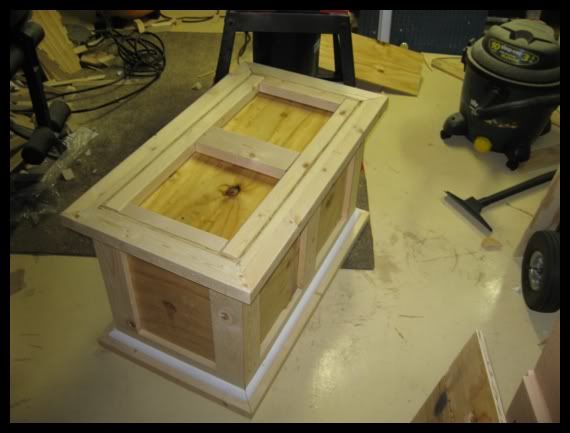 The pond liner has proven to be a worthy competitor to say the least. I planned on adding a "cap" at the top anyway, but I'm not sure I'm happy with the job I did on the liner. I'll be thinking about it in my sleep tonight. 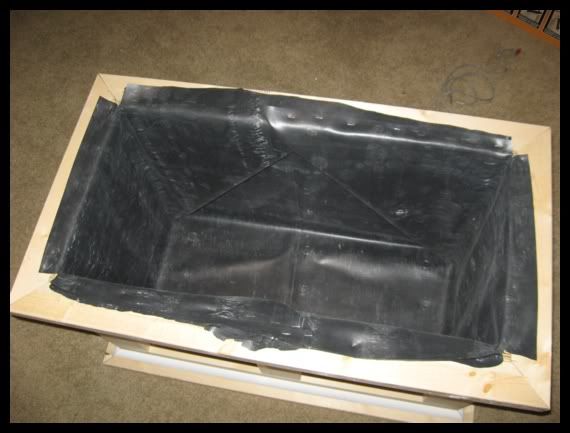 Well, tomorrow, I plan to add the shelf support and hopefully start painting it. I'm no longer excited that I need to build two of these  . .
|
|
|

|
|
|
#19 |
|
Tomatovillian™
Join Date: Mar 2008
Location: SW Ohio
Posts: 1,818
|
It's gorgeous!
What color are you going to paint it?
__________________
Barbee |
|
|

|
|
|
#20 |
|
Tomatovillian™
Join Date: Apr 2009
Location: Illinois
Posts: 180
|
|
|
|

|
|
|
#21 |
|
Tomatovillian™
Join Date: Jan 2007
Location: PNW
Posts: 4,743
|
I have seen a hole in a lower corner of a 30-gallon aquarium
patched with a piece of glass and clear 50-year silicone. It did not leak. That would probably work to caulk your inside seams. (Surfaces that it attaches to need to be clean and dry. A little rubbing alcohol will usually remove any residual oily substances from tools or whatever.)
__________________
-- alias |
|
|

|
|
|
#22 |
|
Tomatovillian™
Join Date: Feb 2006
Location: Germany 49°26"N 07°36"E
Posts: 5,041
|
Where's the eggcrate? You have succeded in building a fine piece of furniture. Ami
__________________
Life's journey is not to arrive at the grave safely in a well preserved body, but rather to skid in sideways, totally worn out, shouting ‘...Holy Crap .....What a ride!' |
|
|

|
|
|
#23 |
|
Tomatovillian™
Join Date: Apr 2009
Location: Illinois
Posts: 180
|
|
|
|

|
|
|
#24 |
|
Tomatovillian™
Join Date: Apr 2009
Location: Illinois
Posts: 180
|
Build day 3 progress:
Ok, so my original idea was to build a wood shelf inside to lay the eggcrate on. As Ted pointed out in a previous post, I would need a lot more support for the eggcrate and soil than just a wood border. He was right. The eggcrate is very flimsy. So, after more thought, I decided on four cross supports out of PVC. But first, in my former life, I used to be into reef aquariums. I remember that the good/expensive tanks are drilled and fitted with a bulkhead. I decided that this may be a good way to port the overflows from the inside to out. First I drilled a couple of holes, one in each end: 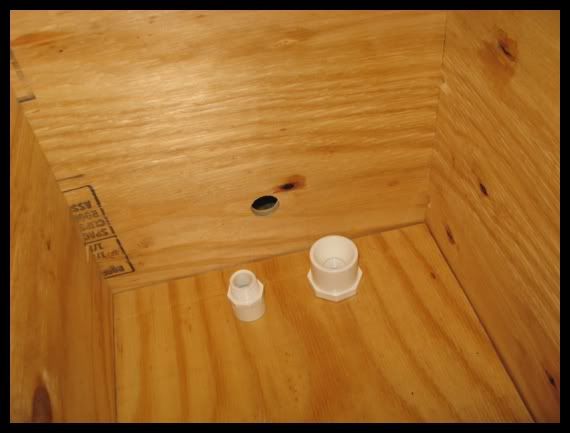 Mock-up of the bulkheads: 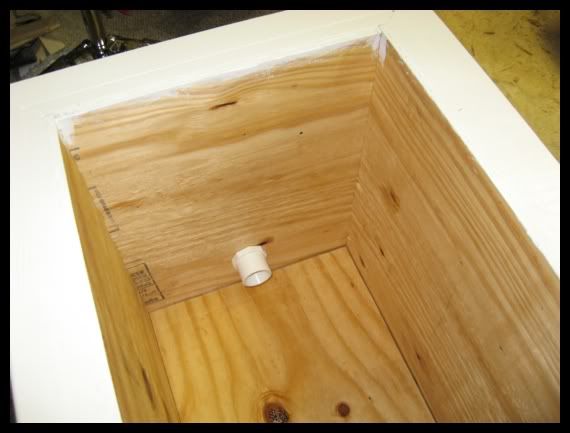 View from the outside: 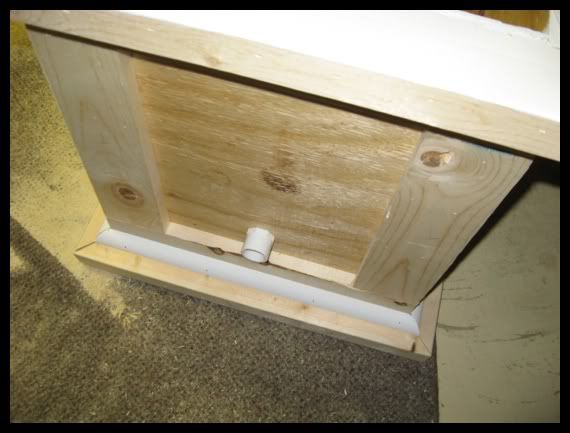 I wasn't happy with my previous attempt at pond liner installation, so I decided to use the best greatest product in the world, duck tape: 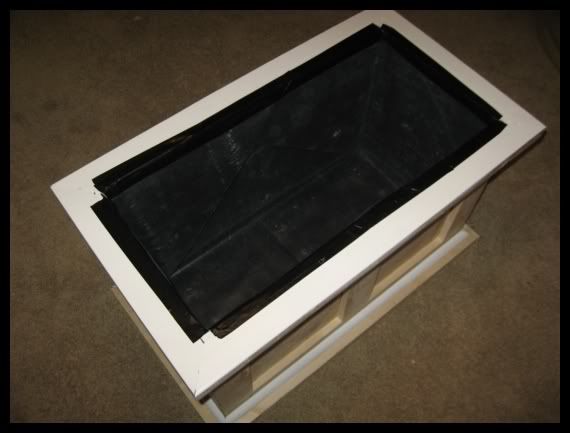 Bulkheads installed: 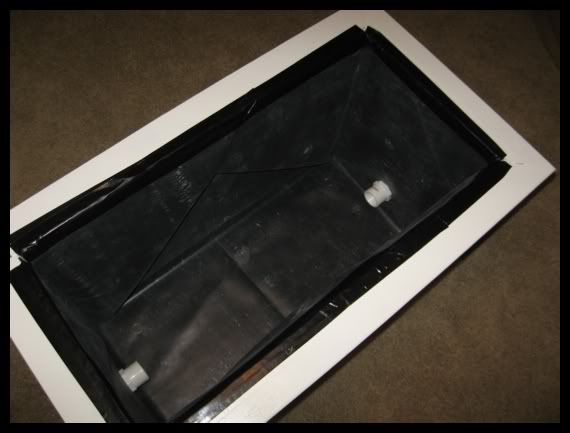 Mock-up of the pvc support pipes (I will probably screw these together for the final build): 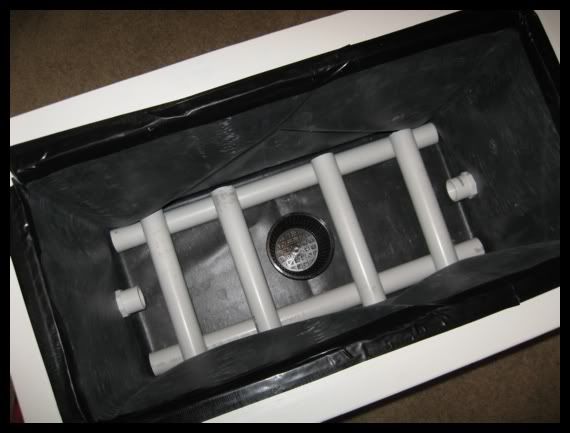 And, mock-up of the eggcrate (I will make a hole in the center for the pond basket and also a hole for the fill tube): 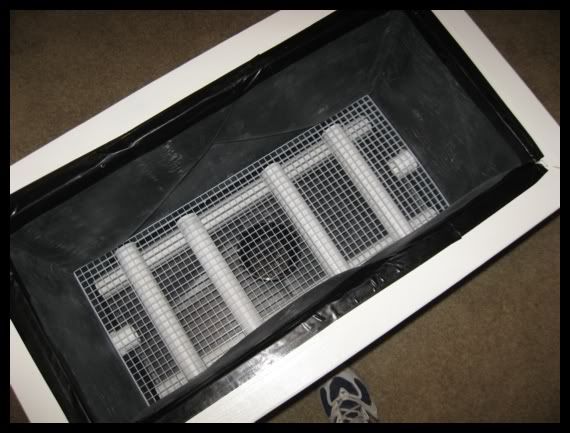 All that will be left is to cover the eggcrate with fiberglass window screen, a little paint, some potting mix, and I should be good to go. Oh, and I've got some ideas for a wood frame cap on top that will cover the duck tape and hopefully securely hold a couple of tomato cages. But that will probably have to wait until I get the second box built - since it's about time to plant out. Last edited by Chucker; May 12, 2009 at 11:52 PM. |
|
|

|
|
|
#25 |
|
Tomatovillian™
Join Date: Jan 2007
Location: PNW
Posts: 4,743
|
You might drill some 1/4 holes in those pvc pipes to help
water flow freely in and around them to the wicking basket. (Drilling a few in the bottom few inches of the fill-up tube speeds up refilling without water backing up the tube, too.) Looks good, anyway.
__________________
-- alias |
|
|

|
|
|
#26 |
|
Tomatovillian™
Join Date: Apr 2009
Location: Illinois
Posts: 180
|
Finally planted out. Here's the latest sequence of pics:
Made some modifications to the PVC foundation so the fill tube could be directly incorporated: 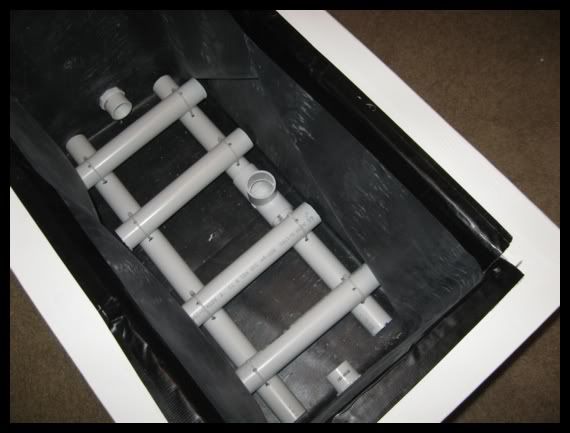 Added window screen over the overflow holes to keep the skeeters out: 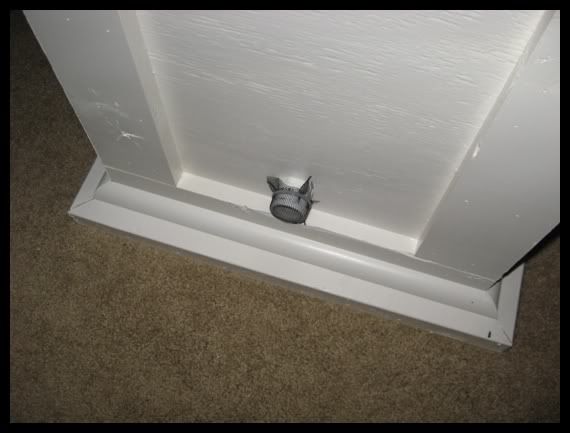 Here's the eggcrate with pond basket mounted: 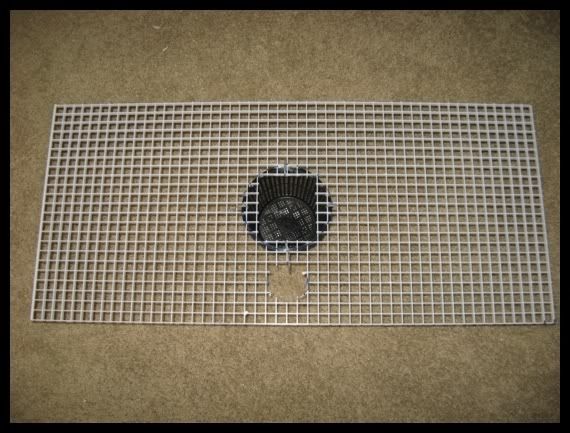 Added window screen over eggcrate, and inserted fill tube: 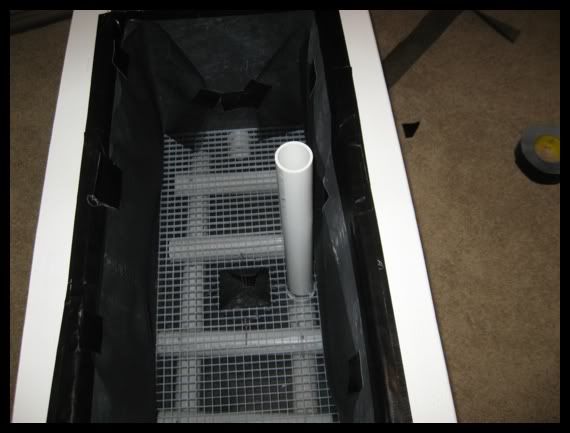 And, they are outside: 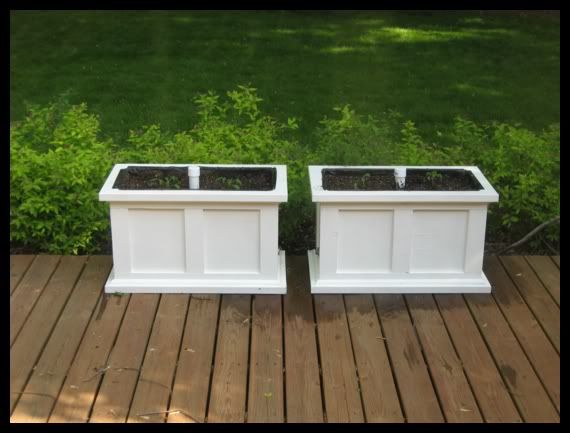 Still have to mount the cages. I've got some ideas and some time before they are needed. |
|
|

|
|
|
#27 |
|
Tomatovillian™
Join Date: Mar 2008
Location: texas
Posts: 1,451
|
Those are some really beautiful planters! Great job
Kat |
|
|

|
|
|
#28 |
|
Tomatovillian™
Join Date: Feb 2006
Location: Germany 49°26"N 07°36"E
Posts: 5,041
|
Chucker, you really did a fantastic job on those "ChuckerTainers". If your plants turn out half as good as your "CT's" you will be inundated in tomatoes. Excellent Job!! What is your plan as far as supporting the humongous plants I'm sure you are going to have? Ami
__________________
Life's journey is not to arrive at the grave safely in a well preserved body, but rather to skid in sideways, totally worn out, shouting ‘...Holy Crap .....What a ride!' |
|
|

|
|
|
#29 | |
|
Tomatovillian™
Join Date: Apr 2009
Location: Illinois
Posts: 180
|
Quote:
 The steel strips are the kind you can buy at your local hardware store, with a bunch of holes already punched in them. With the steel stock secured to the wood frame, I can put the legs of heavy duty tomato cages through the holes and use Ray's ideas of using rope clips to secure the cages in place. If I screw the wood frame to the top of the container, with strong enough steel stock holding the cages, it should hold up to the wind, I think. In addition to supporting the cages, I think if I build the wood frame with a decent joint (such as the lap joint that I think Ted suggested earlier), it should add additional strength to hold the sides of the box together. Anyway, that's what I've got for an idea so far. |
|
|
|

|
|
|
#30 |
|
Tomatovillian™
Join Date: Apr 2009
Location: Illinois
Posts: 180
|
Thought I better update this thread. The boxes seem to be a success so far. I planted two Bloody Butcher plants in one and two Marianna's Peace in the other one. My first BB was ripe July 28th
 . .Here it is:  And here are the wildly overgrown boxes (taken August 2nd): 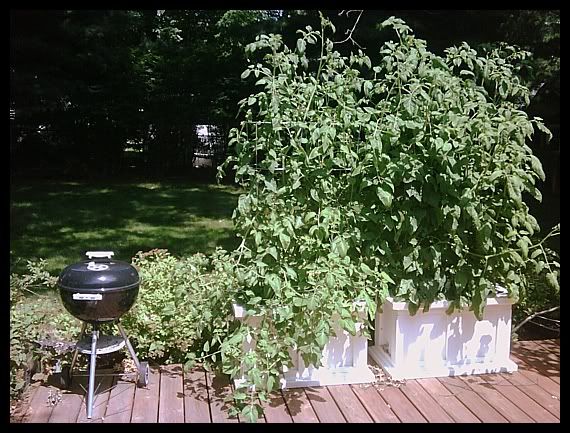 So far so good! Thanks to everyone for the advice and thanks to Ray for getting me excited about the container idea in the first place. |
|
|

|
 |
| Thread Tools | |
| Display Modes | |
|
|
