Tomatoville® Gardening Forums


Notices

Have a favorite recipe that's always a hit with family and friends? Share it with us!

Reply
 
Thread Tools Display Modes
Old September 2, 2019   #16
Worth1
Tomatovillian™
 
Worth1's Avatar
 
Join Date: Feb 2006
Location: Den of Drunken Fools
Posts: 38,539
Default

I also cooked breakfast the other day and fried some eggs.
Here is what I did for an experiment.
I warmed up a spare skillet with the lid on, warm not hot.
Put the three eggs in the skillet to warm up with lid on.
when sausage was cooked I took the eggs out and cracked them in the cooking skillet.
The whites were just starting to congeal and it took no time at all to cook the eggs.
At least to me there is nothing worse than trying to cook an ice cold egg and forgot to take some out to get to room temperature.
Worth1 is offline   Reply With Quote
Old September 2, 2019   #17
Worth1
Tomatovillian™
 
Worth1's Avatar
 
Join Date: Feb 2006
Location: Den of Drunken Fools
Posts: 38,539
Default Smothered vegetables.

Here is what Rajun would call smothered vegetables.
Everything put in the pot and cooked in the oven.
After all the vegetables were put in except the peppers I prepared the poblano peppers.
The things are more flat one way than the other.
I put them on edge and cut them on half.
Removed the stem and seeds then set them skin side up in a layer covering everything.
That is when it all went in the oven for the finale baking.
After removing from the oven the skins come right off and you can them mix the peppers in with no skins.
The kettle came in and out of the oven several times as layer upon layer were added.
Then mixed up.
The peppers created the primary lid.
IMG_20190902_3445.jpg

IMG_20190902_2011.jpg

IMG_20190902_34940.jpg

Last edited by Worth1; September 2, 2019 at 11:04 AM.
Worth1 is offline   Reply With Quote
Old September 2, 2019   #18
GrowingCoastal
Tomatovillian™
 
GrowingCoastal's Avatar
 
Join Date: Jan 2016
Location: Vancouver Island Canada BC
Posts: 1,253
Default

Quote:
Originally Posted by AlittleSalt View Post

Bluntly: I'm going through a summer cold or whatever and I have severe kidney problems when I get sick. A few years ago, I should have died because of this, but 4.5 days in the ICU said otherwise.
Gee Salt!
I hope you're doing well and gettting over the illness.
GrowingCoastal is offline   Reply With Quote
Old September 2, 2019   #19
Worth1
Tomatovillian™
 
Worth1's Avatar
 
Join Date: Feb 2006
Location: Den of Drunken Fools
Posts: 38,539
Default

Frying fish in the little 8 inch Wagner.
Ingredients.
Cornmeal.
Salt.
Fish.
IMG_20190902_51237.jpg
Worth1 is offline   Reply With Quote
Old September 3, 2019   #20
Worth1
Tomatovillian™
 
Worth1's Avatar
 
Join Date: Feb 2006
Location: Den of Drunken Fools
Posts: 38,539
Default

Question for Nematode.
Is your steel skillet carbon steel or mild steel?
Would it really make a difference?
If it is tempered carbon steel over heating can ruin the temper.
Mild steel you cant temper.
And last but not least how thick is it.
Yes I have a project in mind.
Worth1 is offline   Reply With Quote
Old September 4, 2019   #21
Nematode
Tomatovillian™
 
Join Date: May 2012
Location: massachusetts
Posts: 1,710
Default

Carbon steel.
1/8" or maybe slightly thicker.
Nematode is offline   Reply With Quote
Old September 4, 2019   #22
SQWIBB
Tomatovillian™
 
Join Date: Jan 2018
Location: Philly 7A
Posts: 739
Default

Buck Board Bacon & Canadian Bacon Deep Dish Pizza


We just got back from a week of Boy Scouts Summer Camp, I had some leftovers and had a tube of dinner rolls that opened up in the cooler, so being the type of person that despises wasting food (that's why I'm a bit overweight), I decided to recycle.
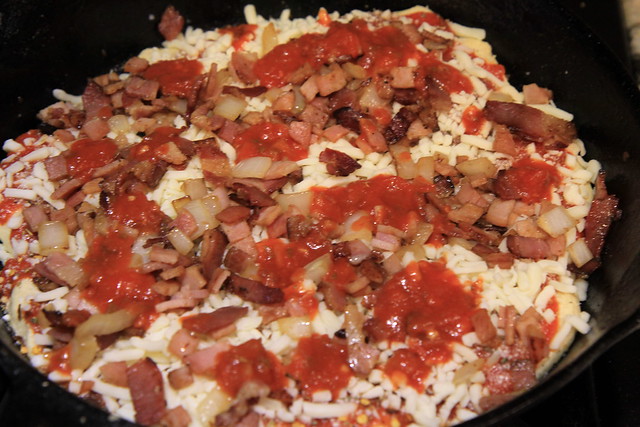
  • Started by cooking up the leftover Buck Board Bacon and Onion

  • Canadian Bacon


  • Pressed in the dinner rolls and added some olive oil


  • Added sauce followed by Spices, Oregano, Basil, Salt, Pepper, Crushed Red Pepper, Parmesan Cheese,


  • A layer of Mozzarella.


  • Added the toppings


  • Dribbled on some more sauce


  • Added a second layer of cheese, in retrospect I wish I would have added some mild cheddar and drizzled the top with my Basil infused Olive Oil as well, I saw the cheddar in the fridge after the pizza was done!


  • Baked at 350° for thirty minutes.


  • Removed from pan to cool on cooling rack 10 minutes, the rolls slightly pulled apart at this point, I need to pinch them together better next time.


  • Here' ya go!


So easy.... a caveman can do it, the results were pretty good.
My wife kept saying them rolls should only be in the oven for 12 minutes, I said well we will see what happens.
The pizza was in the oven for a little over thirty minutes and the crust was fine.

Last edited by SQWIBB; September 4, 2019 at 09:06 AM.
SQWIBB is offline   Reply With Quote
Old September 4, 2019   #23
SQWIBB
Tomatovillian™
 
Join Date: Jan 2018
Location: Philly 7A
Posts: 739
Default

CI Deep Dish Margarita Pizza


One of my favorite things about summer is fresh tomatoes and herbs, there's nothing like it. So with an abundance of tomatoes (sometimes we get quite a few in one shot) we try to use them to their fullest potential, Tomato and cheese sandwiches, BLT's, Margarita Pizzas, etc... The tomatoes that don't make the grade, such as damaged or uneven ripened tomatoes will be used for sun-dried tomatoes.
This dish is one of my wife's favorites.


  • Dinner Rolls


  • Fresh Beef Steak Tomatoes from the Garden


  • Fresh Basil from the garden and Parmesan Cheese.


  • More Basil


  • Mozzarella Cheese


  • A drizzle of olive oil and a pinch or two of salt.


  • Baked at 350°, 30 - 35 minutes


  • Cooling on wire rack


Onto the cutting board for slicing.


  • Ready to serve.


SQWIBB is offline   Reply With Quote
Old September 4, 2019   #24
SQWIBB
Tomatovillian™
 
Join Date: Jan 2018
Location: Philly 7A
Posts: 739
Default

Dutch Oven Pork Tenderloin and Potatoes


I wanted to do something different with a pack of pork tenderloins I picked up, I usually just grill these over direct heat then transfer to indirect heat and cook to an internal temperature of 145°.

So I turn to the magnificent internet and there's a lot of sites suggesting the method posted below, I figured hell it worked great for my Prime Rib on Christmas, lets see how it works on a Pork Tenderloin.


The recipe below is taken directly from Food.com


Food.com - Me


NOTE: The success of this cooking method will depend upon how accurate the temperature of your oven is and how well your oven retains heat. Adjust cooking time +/- according to your individual oven.

NOTICE: If you have a very old oven that is not well insulated, this recipe may not work for you, as heat retention/residual heat is important to the success of this recipe.
  • Determine the EXACT weight of roast from the meat wrapper. Weight will determine how long to cook the roast.
  • Preheat oven to 500 degrees. Remove tenderloin from refrigerator. Season meat as desired. Place seasoned meat in an uncovered roasting pan on a shelf in the bottom 1/3 of your oven.
  • IF YOU HAVE AN OVEN PROBE OR THERMOMETER THAT HAS A WIRE THAT GOES THROUGH THE SIDE OF THE OVEN DOOR, BY ALL MEANS USE IT AND SET THE TEMPERATURE ALARM FOR 140 DEGREES. REMOVE MEAT FROM OVEN WHEN ALARM ALERT GOES OFF (probably before an hour has expired). After resting 5-10 minutes, the roast should reach a safe 145-150 degrees.I do have one but used my Maverick.I pulled my Loins (insert smile) at 145°.
  • Bake EXACTLY 5 1/2 minutes PER POUND. Adjust +/- according to your oven's accuracy and heat retention. Turn oven OFF and DO NOT open oven door for 45 to 1 hour. Remove pork from oven, lightly cover with foil, and let rest 5-10 minutes to redistribute internal juices. Roast should be done, very slightly pink in the center, and very moist. I cooked these at about 7 minutes longer at high heat than suggested. And the tenderloins were ready in about twenty minutes after the initial braise. I did not foil.
  • NOTE:******* For anyone questioning this method of cooking, it really does reach the proper internal temperature on a thermometer. According to Sara Moulton on FoodTV, botulism is killed at 138 degrees, and 145 is a safe temperature for pork, although the USDA recommends 160 degrees (meat will be much drier). If the center of the meat is not a little pink, it is overcooked! I believe the FDA has approved whole meat Pork to be safe at 145°.
  • VARIATION: To make Roasted Veggies along with the tenderloin, peel carrots and potatoes, and cut into about 1-inch cubes. Season as desired and drizzle with a little oil. Add vegetables to pan around (but NOT touching) pork tenderloin. Cook tenderloin as instructed above. The roasted potatoes and carrots should be done when the roast is done. You may need to adjust the size of the potatoes and carrots depending upon the weight of your tenderloin and how long you cook it. Yes I cut my potatoes too big, but heck I like them big, par broil then add.


So lets do this!


  • Start by buttering a DO, warm the pan I didn't on this particular cook. I think its more fun this way.


  • Make sure to jot down the weight of the tenderloins as your braise time will be dictated by the weight, so if you have a 3 pound double package of pork tenderloin, your cook time would be 5-1/2 minutes at 500° per pound, so a 1-1/2 pound tenderloin would be 8 minutes 25 sec.


  • 1/4 cup of Soy sauce is poured over the Tenderloin.


  • Tenderloins are coated with Montreal Steak seasoning, one heavy one light, and I've said this before and I'll say it again, "for the life of me I don't know why a lot of folks scoff at this spice, I love it".
  • A 1/4 cup of Worcestershire is poured over the tenderloins and another sprinkle of Montreal Steak Seasoning.

  • Potatoes and Onions are added (I had no carrots but would have tossed some in if I did).
  • Added 1/2 cup sweet vermouth, 1 cup of water and placed in the oven uncovered at 500° for 14 minutes (should actually be 5-1/2 minutes per pound)
  • The Tenderloins should really be exposed and not have anything on top of them... oh well.


  • After 14 minutes at 500°, The larger tenderloin is probed in the thickest part, the door is shut and oven is turned off, do not peek. I didn't want to probe the tenderloin at the beginning because I was afraid to fry the probe. For all the germ-a-phobes, the surface is definitely well above the safe temp of 145° at this point.
  • This particular cook was pretty quick, after the initial 14 minutes at 500°, the tenderloin IT increased to 145° in about twenty minutes.
  • Tenderloins resting.

  • Sample,(Chefs Prerogative)


  • Potatoes were not done enough so the DO was placed back in the oven while the tenderloins rested, I would suggest par boiling the potatoes or if you want, and you have the time, just pop the DO back in the oven while the Tenderloins rest, this worked for me. This is why the recipe calls for 1" cubes, hey I like my potatoes big if I want 1" cubed potatoes, I'll make mashed potatoes.
  • Both tenderloins are sliced, one is covered with Aujus' the other is not.


  • My oldest Daughter made a Potato, Bacon, Cheddar pie that is simply amazing!


These tenderloins were pulled at 145° with a little bit of carry over heat.

NOTE: Pork Tenderloins are a very tender cut of meat and some folks may think it has a "gummy" texture, these were perfect for my oldest daughter and myself, but my wife, son and younger daughter prefer a denser texture.


Pork Loins are much denser at an internal temp of 145°, which is what my wife and son likes.

If I do these again, one tenderloin would be pulled at 145° internal temp and the other will be pulled at 160° (I shudder at the thought).

Or I may do a Loin and Tenderloin at the same time and gladly eat the "Gummy" one (insert sarcasm).

Thanks for tuning in.
SQWIBB is offline   Reply With Quote
Old September 4, 2019   #25
SQWIBB
Tomatovillian™
 
Join Date: Jan 2018
Location: Philly 7A
Posts: 739
Default

Deep Dish Pizza


I have always loved cooking in Cast Iron, especially Dutch Oven Cooking. Years ago we had a huge Cast Iron pan, I believe it was 15", anyhow we had a broken dishwasher that we stored it in. It was forgotten and a few years later we replaced the dishwasher, do you think we would have looked inside to see if there was anything in it? Nope, so our beautiful CI Pan made its way to a landfill, or hopefully someone found it before it became landfill.


Fast forward to this month, I been wanting to get a replacement but wanted something bigger, my research led me to a 17" lodge skillet with excellent reviews. I ordered the skillet and seasoned it 6 or 7 times with flax seed oil, then cooked some eggs, and pork roll to test. The next day Laura done some thighs on it. A few days later I used it on my Schwenker to cook up some breakfast sandwiches.


Bacon, Pork roll, sausage, fried ham and eggs. Later on we used it to cook some pork tenderloins.


Anyhow, not to get too far off of track, we made some pizzas Sunday for my wife's annual, "make cookies, and Christmas ornaments" with the entire family... funny this tradition started out as my parents coming over and making gingerbread houses with the kids. I'll post a few photos of that at the end of this post.


OK, First lets start with the dough, for the dough Laura decided to use the recipe found on Food Networks Recipe courtesy of Bobby Flay. Sorry, no pics, it's just dough for goodness sake!


Yield:
2 (14-inch) pizza crusts


Ingredients

  • 3 1/2 to 4 cups bread flour, plus more for rolling (Chef's Note: Using bread flour will give you a much crisper crust. If you can't find bread flour, you can substitute it with all-purpose flour which will give you a chewier crust.
  • 1 teaspoon sugar
  • 1 envelope instant dry yeast
  • 2 teaspoons kosher salt
  • 1 1/2 cups water, 110 degrees F
  • 2 tablespoons olive oil, plus 2 teaspoons


Directions

Combine the bread flour, sugar, yeast and kosher salt in the bowl of a stand mixer and combine. While the mixer is running, add the water and 2 tablespoons of the oil and beat until the dough forms into a ball. If the dough is sticky, add additional flour, 1 tablespoon at a time, until the dough comes together in a solid ball. If the dough is too dry, add additional water, 1 tablespoon at a time. Scrape the dough onto a lightly floured surface and gently knead into a smooth, firm ball.

Grease a large bowl with the remaining 2 teaspoons olive oil, add the dough, cover the bowl with plastic wrap and put it in a warm area to let it double in size, about 1 hour. Turn the dough out onto a lightly floured surface and divide it into 2 equal pieces. Cover each with a clean kitchen towel or plastic wrap and let them rest for 10 minutes.

Recipe courtesy of Bobby Flay


Laura made 4 of these.


Sauce


For my sauce I always make a modified sauce, I start with a few cans of Peppinos pizza sauce, the Peppinos has a nice tart taste and not too sweet, I then add some spaghetti sauce, a can of tomato paste, a bit of Parmesan Cheese, Oregano, Basil, Parsley, Onion powder, teaspoon of fresh garlic and a tablespoon of Olive Oil. Sauce is simmered for twenty minutes then tasted and salt and pepper are added, if I am making the sauce for me, I add a bit of crushed red pepper.


We made 6 pizzas, the first two were thin crust 14" pies, a white pizza, the other a plain, then I started the two deep dish pizzas, one was a plain and the larger was a Hawaiian Pizza, we had some dough, sauce and cheese leftover so I made some bread sticks and Laura made another plain pizza.


Back to the deep dish Hawaiian Pizza.

  • The oven is preheated to 425, pan is coated liberally with olive oil and placed in the oven as I roll out the dough, about 10 minutes or so. I used three of the divide dough balls for this pie. Then about 8 string cheese sticks are split in half.


  • The pan is taken out of the oven and the oven is bumped up to 500, the pan receives another tablespoon or so of olive oil. The dough is folded in half and unrolled into the hot pan, working quickly the bottom of the pizza is layered with provolone cheese


  • Then string cheese is pushed into the edge of the crust and the crust is then worked over the cheese. YES! This is gonna be a stuffed crust pizza.


  • Ham is added.


  • Drained pineapple


  • Mozzarella Cheese is added.


  • Sauce is added, I just dolloped it on top from a spoon, then the top is dusted lightly with Parmesan cheese. Olive oil is then drizzled heavily on the crust and the crust is coated with a heavy dose of Parmesan cheese and a bit of coarse salt.


Whoa, stop here if you plan on making this... This is where I will be adding a pound of cooked bacon next time. OK, Back to the program.


  • Then more cheese and dolloped sauce is added.


Then its into the 500°F oven for 20 - 25 minutes.


  • Meanwhile there's some crust and string cheese leftover that I make some stuffed Parmesan Bread sticks to munch on with the pie.


  • Pizzas are done.


  • Heres another pizza, to give you an idea of how big this thing is.


  • The pizza needs to be removed from the pan or it will never cool. A wire rack will help cool quicker and keep the crust crispy, I don't bother. Pizza needs to rest at least twenty minutes, 30 is not out of the question. This was cut into 12 slices and one slice is fairly filling, I could eat two but three would be too much.


  • I hope you enjoyed my cook, here's a slice on me. Enjoy!


I would love to make a traditional Chicago Deep Dish but my family is pretty much "plain Pizza people", but I can get away with a Hawaiian now and then, and Like I said before, next Deep Dish is gonna have some bacon
!
SQWIBB is offline   Reply With Quote
Old September 4, 2019   #26
SQWIBB
Tomatovillian™
 
Join Date: Jan 2018
Location: Philly 7A
Posts: 739
Default

Dutch Oven Breakfast


November 9th, 2017


For one of our meals at Trap Pond this year I decided to try out this Dutch Oven Breakfast Recipe that I found on line, I tweaked it a bit more but it needs a few more tweaks. I will put the tweaked recipe at the end of this post.


Ingredients
  • Half of a small onion diced finely
  • Ground Sausage - 2 small packages
  • 1 pkg. Frozen Shredded potatoes
  • One dozen eggs
  • 4 Cups shredded cheese blend (used three)
  • 2 cups of pre-cooked bacon crumble
  • 1 can biscuit dough or homemade biscuit mix (used 2 and it was too much bread)
  • salt and pepper to taste

For Coals
  • 12" DO - 14 on the top. 10 For the bottom should give you a temperature of 350 degrees.


Directions

  • While all the coals are heating up place the dutch oven over them cook the sausage until browned then add the onions.
  • Remove from heat and pour the package of hash browns over it.
  • Then crack the 12 eggs over the potato layer as evenly as possible. Add spices on top of eggs.
  • Sprinkle the cheese as the next layer.
  • 2 cups of Bacon Crumble for the next layer
  • Then place the biscuits evenly on top of the cheese.
  • Cover the dutch oven and then add coals on the top and bottom of dutch oven. Allow to cook for 45


  • First we need to build up an appetite


  • OK, now it is time to make breakfast.


  • Yeah, they're hungry!


Next time I make this, it will go like this;


Ingredients
  • Half of a small onion diced finely
  • Half of a Green Pepper diced finely (2 guys at camp don't like green peppers)
  • Ground Sausage - 2 8oz. packages
  • 1 pkg. Pre-Cooked Tater Tots or Crowns
  • One dozen eggs
  • 4 Cups shredded cheese blend
  • 2 cups of pre-cooked bacon crumble
  • Bisquick, enough to cover the top (will need 1/2 cup of milk)
  • salt and pepper to taste
For Coals
  • 12" DO - 14 on the top. 10 For the bottom should give you a temperature of 350 degrees.
  • Wipe the DO down real good with crisco before adding ingredients.


Directions

  • While all the coals are heating up place the dutch oven over them cook the sausage until browned then add the onions and green peppers.
  • Remove from heat and pour the package of pre-cooked Tater Crowns/Tots on top
  • Then crack the 12 eggs over the potato layer as evenly as possible, break the yolks and spread around or beat lightly in a bowl then add. Add spices on top of eggs.
  • Sprinkle half the cheese as the next layer.
  • 2 cups of Bacon Crumble for the next layer.
  • The rest of the cheese for the next layer.
  • Then drop in dollops of the Bisquick on top of the cheese.
  • Cover the dutch oven and then add coals on the top and bottom of dutch oven. Allow to cook for 45
I used bacon crumble from Sams Club


To make it easier at camp

  • Make the tater tots/crowns at home place in a Ziploc bag or container
  • Dice the onions and Peppers place in a Ziploc bag or container
  • Place the cheese in a Ziploc bag or container
  • Place the Bisquick in a Ziploc bag or container
  • If you use Hash Browns, I suggest you pre-cook them.


Bisquick Mixing Ratio

  • 1 1⁄2 cups Bisquick
  • 1⁄2 cup milk
SQWIBB is offline   Reply With Quote
Old September 4, 2019   #27
SQWIBB
Tomatovillian™
 
Join Date: Jan 2018
Location: Philly 7A
Posts: 739
Default

Dutch Oven Chicken and Dumplings

October 7th, 2017


This past weekend I had to stop up to our trailer for some more maintenance, we asked mom and dad to come with us and I figured I would make some Chicken and Dumplings for dinner Saturday.


This recipe is as easy as they come and would be a great camping recipe, most of the ingredients can be prepped before hand. Veggies can be diced and bagged with the butter and thyme before hand, Chicken can be cubed and bagged and tossed in a cooler with the bagged diced veggies, Biscuits and Milk.
A Carton of Broth three cans of soup Salt and Pepper and some oil can be tossed in a bag stored in the DO.


I have to say, that this recipe is a keeper, everyone raved about it, it is something I will be making often.


Original Recipe Found at.
http://www.treksw.com/easy-chicken-a...-oven-recipes/


I Doubled the recipe to serve 10 but this will serve 12 no problem. I also modified the recipe slightly.


Ingredients (I eyeballed most of the recipe, I usually do not precise measure with Dutch Oven Cooking)


  • 5 lbs chicken breasts cubed to 3/4".(Thighs suggested)
  • 3 tbs vegetable oil
  • 4 tbs butter
  • 1.5 cups (2 small onions) – finely diced
  • 2.5 -3 cups carrots – finely diced (used baby carrots)
  • 2.5 -3 cups celery leaves too– finely diced
  • few sprigs of thyme
  • 1 tsp sea salt
  • 1 tsp pepper
  • 32 oz chicken broth
  • 3 cans cream of chicken with herbs soup
  • 3-4 cans cheap biscuits
  • 3 cup milk
  • 1 case of beer


Note: Chicken thighs are preferred but If using chicken breast, cook the chicken and add with the milk and cream of chicken soup to prevent them from drying out by overcooking. The breasts were fine in this recipe but any longer and they would have dried out.


I could only find Chicken Breasts.


  • Set up your dutch oven for frying. Put your vegetable oil in the dutch oven.

  • Once oil is shimmering add chicken and slightly brown, remove chicken and drippings and reserve for later.


  • Toss in butter and once butter has melted add Celery Onions and Carrots


  • Cook 10 minutes or so.


  • Add chicken and drippings back to Dutch Oven (see note above if using chicken breasts) Add salt and pepper, stir mixture.


  • Cook 10 minutes

  • Add sprigs of Thyme and Chicken Broth, cook 20 minutes. While that is cooking prepare your biscuits by quartering.


  • Remove the sprigs of thyme and discard.


  • Add the Cream of Chicken soup and milk, stir.


  • Add the biscuits and stir them in.


  • Cover and cook 30 minutes, opening once or twice during the cook to gently stir in the biscuits as they will all float to the top.


  • Optional, Cook an additional 10 minutes with the lid off.


SQWIBB is offline   Reply With Quote
Old September 4, 2019   #28
SQWIBB
Tomatovillian™
 
Join Date: Jan 2018
Location: Philly 7A
Posts: 739
Default


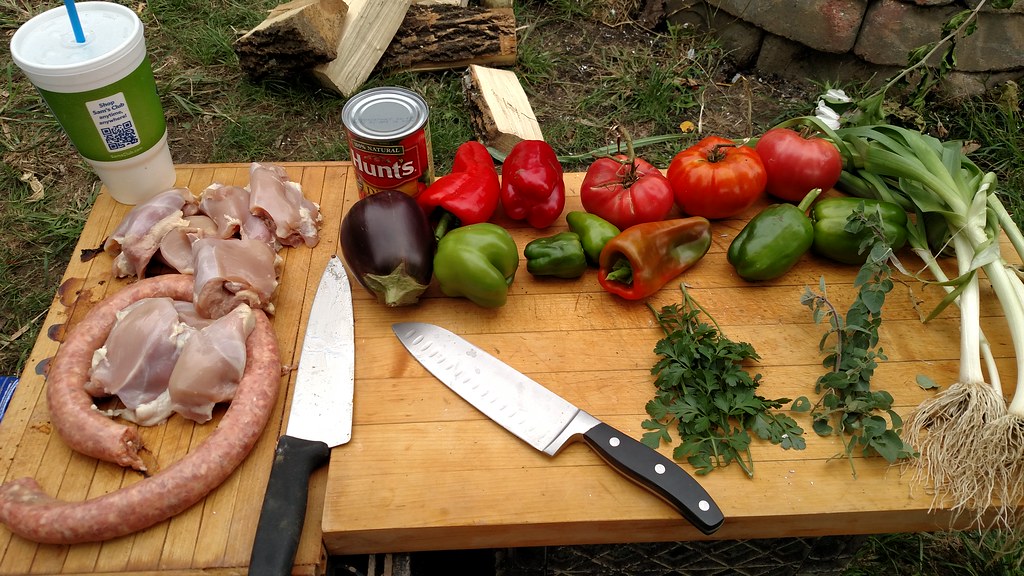
I had a decent amount of veggies left so I decided to pull out the schwenker and the dutch oven and make a Garden Jambalaya....nothing hot and no shrimp, or I would be the only person eating it. Not that that's a bad thing but my better half was wanting some mild Jambalaya.
  • Several Hours Later, all the plants are burnt and wood has burnt to coals.


  • As I chop the vegges my better half is off to the store for some Sweet Italian Sausage and some boneless chicken thighs.

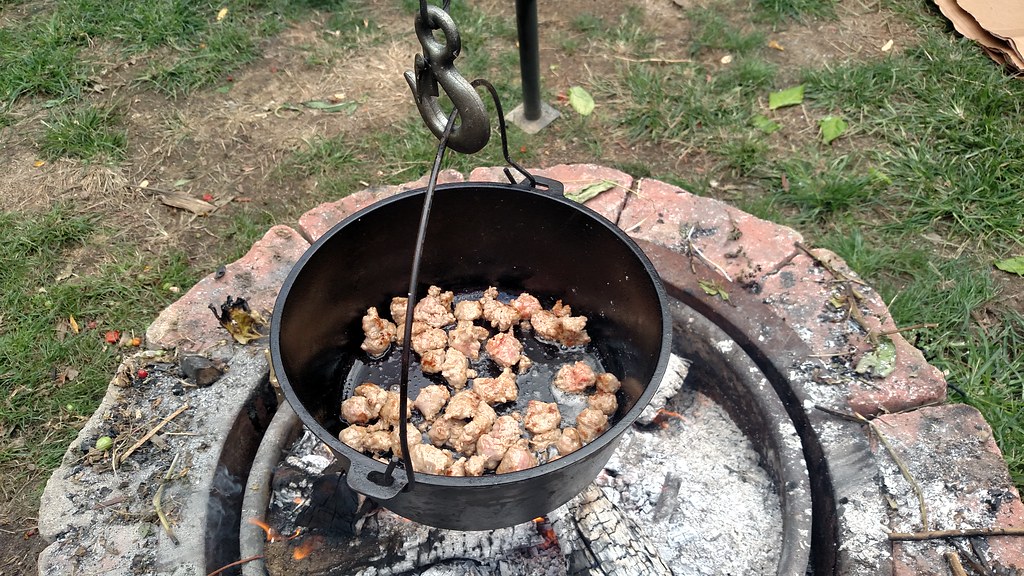
  • Tossed some butter in the DO

  • Woohoo! Meat is here!


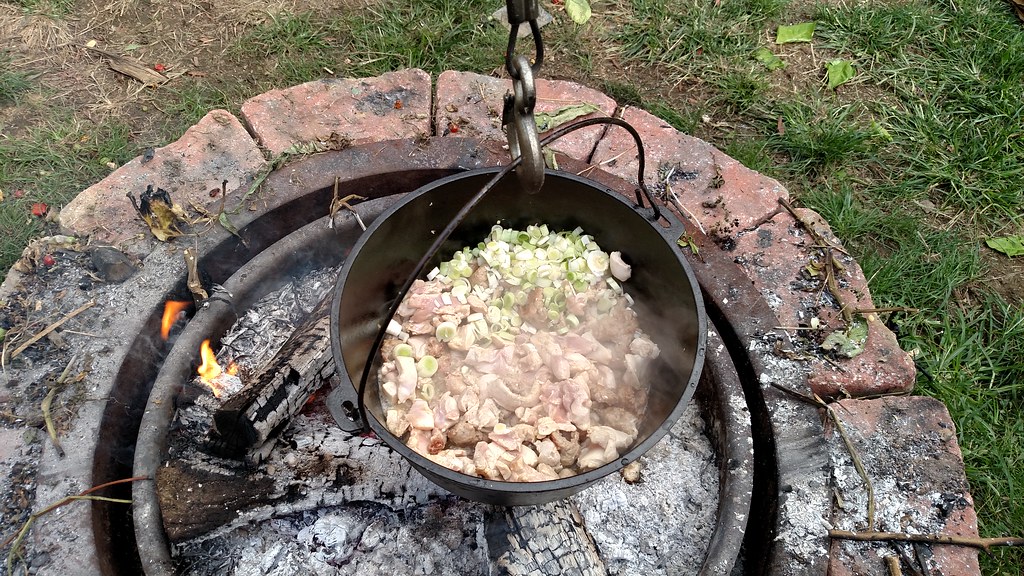
  • Sausage is browned then the chicken is added


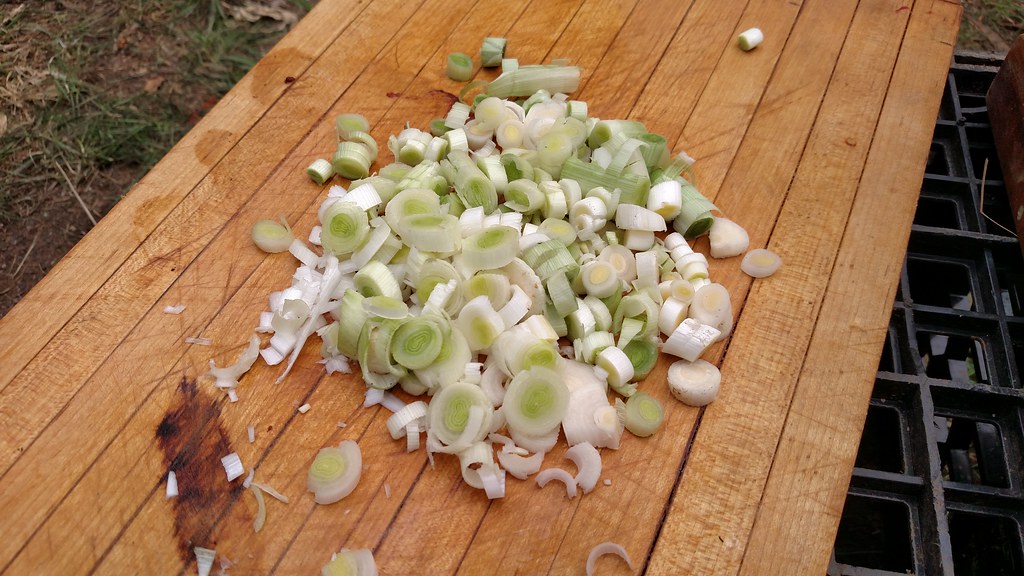
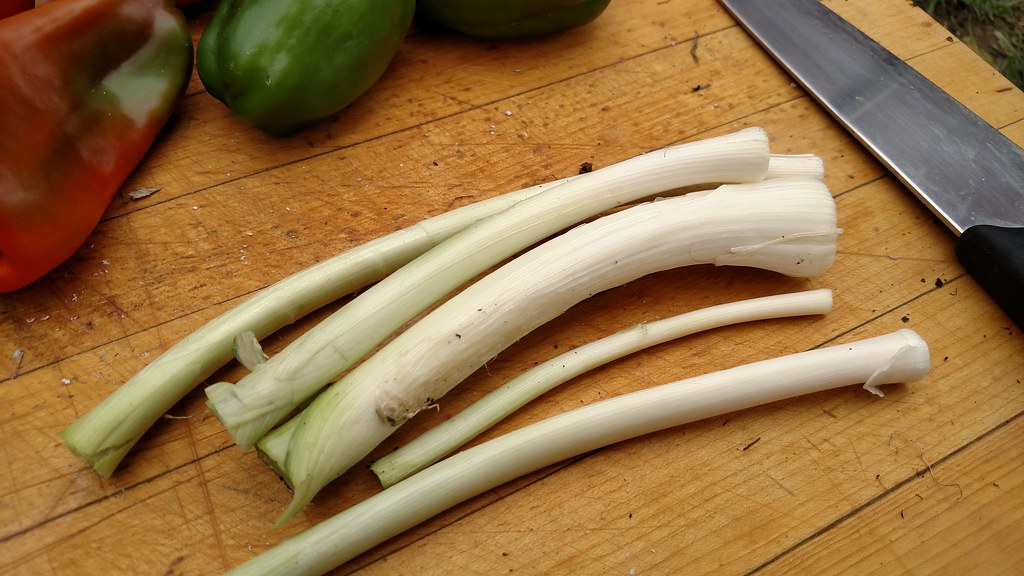
  • Leeks are sliced and tossed in, wow what a wonderful smell these leeks have.


  • Peppers are next.

  • DO Is covered for each time after the initial browning of the meats and onions.


  • I usually don't add eggplant to my Jambalaya. I really pamper my eggplant.


  • Parsley and Oregano is next, I let the Eastern Black Swallowtails have the early parsley harvest, If I see them on the plant, it's theirs and I leave them be. The parsley is coming back pretty strong now, The parsley is fairly hardy,it will usually be kicking till about December.


  • Then some tomatoes.


  • Then some celery. (not from the garden). The lid is placed on the DO, I grab another beer and will let this simmer for about an hour. A tablespoon of garlic is added and a tablespoon of my Philly Style Rub.


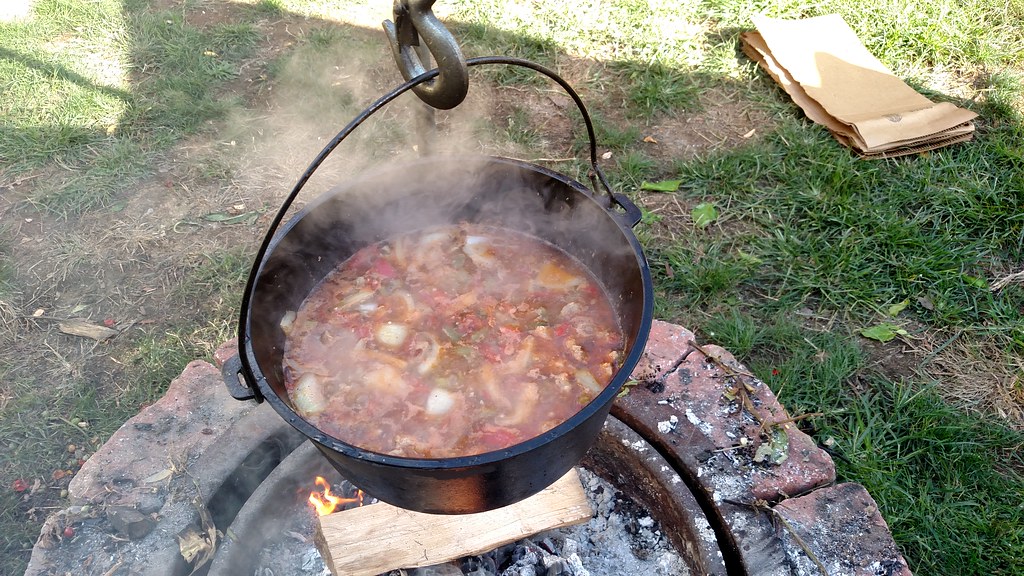
  • Looking good, 32 oz. of chicken broth is added.


  • Half of a coarse chopped onion is added.


  • 3 cups of white rice is rinsed multiple times then added and stirred in.


  • Lid is tossed on the DO and will cook another thirty minutes.


  • Raised the DO to keep it on low heat.


  • The jambalaya was pretty thick so I tossed in another 32 oz. of chicken broth and the 24 oz. can of diced tomatoes.


  • How did it turn out? well I can say this, It was a beautiful evening, sitting there eating my jambalaya, enjoying the bug-less cool night and the fire, sipping on an ice cold glass if Killians.


  • Everyone enjoyed the Jambalaya, but If I were making this for the guys or myself, it would have been loaded with shrimp, hot sausage and a few cans of RoTel and some other hot goodies.
SQWIBB is offline   Reply With Quote
Old September 4, 2019   #29
SQWIBB
Tomatovillian™
 
Join Date: Jan 2018
Location: Philly 7A
Posts: 739
Default

Jambalaya

September 30th, 2017


This past weekend I had to stop up to our trailer for some maintenance, since I was staying the weekend I figured I would make some Jambalaya for Sunday dinner at home and some lunches during the week.


There is something therapeutic about cooking outdoors in a dutch oven, especially a stew or jambalaya type recipe, no worrying about ingredients and cook times, just slice, dice, cook and enjoy, no pressure.


Ingredients

  • 4 tablespoons butter
  • 2 tablespoon vegetable oil
  • 8 skinless, boneless chicken thighs cubed
  • 1 pound andouille sausage, cubed, I used Chorizo
  • 6 ribs celery and leaves, chopped
  • 1 large yellow onion, chopped
  • 2 green bell pepper, seeded and chopped
  • 5 cloves garlic, peeled and minced or pressed
  • 1 28-ounce can crushed tomatoes
  • 1 can of Rotel
  • 1 can diced tomatoes.
  • 32 oz. chicken stock
  • 2 tablespoons Creole seasoning
  • 4 bay leaves, didn't add
  • 4 cups rice
  • 2 pounds 26-30, peeled, deveined and tail off
  • 2-3 green onions/Leeks, chopped


Instructions

Melt 2 tablespoons butter and vegetable oil in large dutch oven pan over medium high heat. Add chicken breasts and Andouille sausage (I used Chorizo sausage because thats all I had, but I prefer Andouille) cook for 10 minutes, stirring occasionally so all sides are lightly browned and the chicken is cooked through.


Lower heat to medium, add the celery, onion, Leeks, bell pepper and garlic. Cook for 10 minutes or until vegetables soften. Add crushed tomatoes, diced tomatoes, chicken stock, creole seasoning, bay leaves and Rotel. Cook for 30 - 60 minutes then add rice and cook for about 30 minutes. Add shrimp and cook until shrimp are cooked through. Optional; Garnish with green onions.
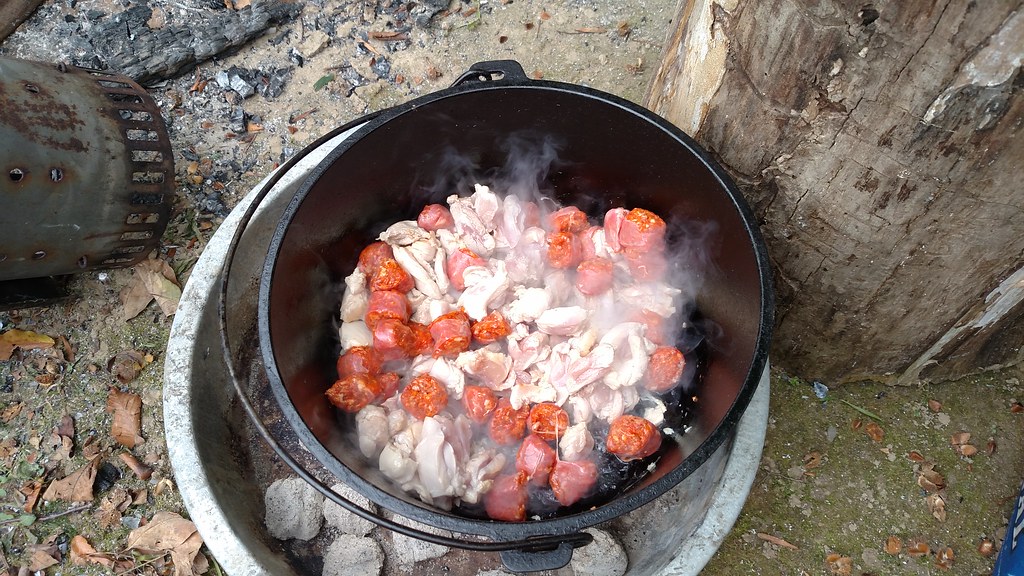


  • Chorizo, Chicken thighs, oil and butter


  • Onion


  • Green Peppers


  • Leeks from the Garden


  • Leeks


  • Celery


  • Garlic
  • Chicken Stock
  • Crushed Tomatoes


  • Creole Seasoning
  • My Secret ingredient.
  • Rice
  • Quick stir.


  • Now we wait.


  • Some Jambalaya is removed for the family members allergic to shellfish. I needed to make room too!


  • Shrimp is added


...and dinner is served.


  • Cleanup, I had to come up with a way to clean the DO, I usually have a scrubbie (no soap) that I use but had to figure another way.


  • Drying.
SQWIBB is offline   Reply With Quote
Old September 4, 2019   #30
SQWIBB
Tomatovillian™
 
Join Date: Jan 2018
Location: Philly 7A
Posts: 739
Default

Not a recipe but one of my Cast Iron Skillets being used.


New York Strip Steak


My daughter was home from college for Christmas break and for her first meal home we always do a nice steak and potato dinner, must be the Irish in her.

The wife unit was off to the store and said, "London Broil" is on sale, I said, "absolutely not, look for rib-eye or Strip instead", well she comes home with some NY Strip... awesome.


The family request was for my Cheddar Bacon Twice Baked potato, I actually prefer the Ranch Bacon one I make, anyhow this time I used sour cream in the potato in place of the half and half... much better.

The kids have been loving these twice baked potatoes since I've been making them with my new Cuisinart Prep Plus Food Processor.


And another family favorite is the Red Lobster Cheddar Bay Biscuit.


Its a good feeling when your kids are excited over you making dinner as opposed to ordering a pizza.


The more I cook meat on cast Iron, the more I prefer it over the grill.


I just had to try out the new serving plate my Brother and SIL got me.


  • NY Strip
  • Twice Baked Bacon Cheddar Potato
  • Baked Potato, sour cream and Butter
  • Greens with Balsamic Vinegar
  • Red Lobster Cheddar Bay Biscuit (Copycat Recipe)
  • Glass of wine


A few pics


Woohoo, my plate!
SQWIBB is offline   Reply With Quote
Reply


Posting Rules
You may not post new threads
You may not post replies
You may not post attachments
You may not edit your posts

BB code is On
Smilies are On
[IMG] code is On
HTML code is Off

Forum Jump


All times are GMT -4. The time now is 02:52 PM.


★ Tomatoville® is a registered trademark of Commerce Holdings, LLC ★ All Content ©2022 Commerce Holdings, LLC ★