

|
|
#46 |
|
Tomatovillian™
Join Date: Feb 2006
Location: Den of Drunken Fools
Posts: 38,539
|
Here you go folks putting my money where my mouth is.
I'm gonna brag on this one.  I ground the buttress thread form tool from blank stock. Set the lathe up for 6 threads per inch. Took measurements and made the darn thing out of 3/4 inch PVC. I also made room for a hose washer in the bottom. Fits like a glove.  Worth IMG_20160519_35894.jpg IMG_20160519_55741.jpg IMG_20160519_8974.jpg IMG_20160519_21206.jpg |
|
|

|
|
|
#47 |
|
Tomatovillian™
Join Date: Feb 2006
Location: Den of Drunken Fools
Posts: 38,539
|
I decided to put hose threads on the other end hose threads look like 11/12 per inch.
Mine will cut 11 per inch but it worked out fine. Worth IMG_20160519_58836.jpg |
|
|

|
|
|
#48 |
|
Tomatovillian™
Join Date: Jun 2012
Location: Illinois, zone 6
Posts: 8,407
|
Cool. Now you need an infomercial to sell them.
|
|
|

|
|
|
#49 |
|
Tomatovillian™
Join Date: Feb 2006
Location: Den of Drunken Fools
Posts: 38,539
|
Some how I feel that about the time it hit the market I would get sued or they would change it up some how.
 You cant even patent the darn thing. Well maybe you can I dont know.  No where on earth that I know of is there an adapter from hose thread to 6 inch buttress thread. Buttress threads are all around us mostly on plastic pill bottles and so on. |
|
|

|
|
|
#50 |
|
Tomatovillian™
Join Date: Apr 2016
Location: VA - Zone 7A
Posts: 344
|
Would this Miracle-Gro LiquaFeed Kit replace the need for a pressure regulator & backflow preventer?
Last edited by MrSalvage; May 22, 2016 at 06:01 AM. Reason: spelling |
|
|

|
|
|
#51 |
|
Tomatovillian™
Join Date: Jan 2014
Location: Tomato Cornhole
Posts: 2,550
|
Great job Worth, I'll take 2 when you make more. PM me and we'll work out the details.!
|
|
|

|
|
|
#52 | ||
|
Tomatovillian™
Join Date: Feb 2006
Location: Den of Drunken Fools
Posts: 38,539
|
Quote:
One of the questions brought up was contaminating the water supply. I did some research and it is built with a back flow type preventer inside. There is also no need for a regulator Quote:
One thing I did do was make a mistake on the hose end threads. They need to be female internal or you would need a female female adapter to connect to the hose the right way. It would be best and cheaper to just buy the fitting you need to fit the end of the 3/4 PVC pipe. One of the things I did do with my hose end MG contraption was to take it apart and bore the orifice out to 0.040. Worth |
||
|
|

|
|
|
#53 |
|
Tomatovillian™
Join Date: Jan 2014
Location: Tomato Cornhole
Posts: 2,550
|
Worth, I think the male threads will work for what I want to do. I can use a washer hose with 2 females and attach it to a 5 gallon bucket with pvc fittings. A smaller flexible hose will help keeping pressure from a big hose pulling on the feeder threads. I can set the bucket on a stand higher than the faucet, fill it with solution and not have to worry about mixing it for a while.
|
|
|

|
|
|
#54 | |
|
Tomatovillian™
Join Date: Feb 2006
Location: Den of Drunken Fools
Posts: 38,539
|
Quote:
 It appears the green shoulder you see that is up against the PVC pipe in the below pictuer has something to do with the water running out the end of my hand held model. The one I cut threads on this happens, the one I made from the bottle it doesn't. I have no idea if it would do the same with the faucet type as it works differently. In either way I can still overcome this. Nope I just checked it is the green end cap itself that does it. It is obvious now and it is fixed. I set the threads back like the original bottle and turned the end down so the cap snaps on like it does the bottle. It was then tested and everything works great. I wanted to do this to begin with but thought I could get completely away from the factory cap. It just so happened the inside shoulder of the cap fit the inside of SCH 40 PVC perfectly. Worth |
|
|
|

|
|
|
#55 |
|
Tomatovillian™
Join Date: Feb 2006
Location: Den of Drunken Fools
Posts: 38,539
|
Here are pictures of the modification.
Be back in a minute to explain. Okay I am back. In the first pictuer you will see where I set back the threads and thinned the wall of the pipe. The second pictuer if you look there is a little ridge on the MG cap this ridge snaps into the inside diameter of the bottle or in this case the PVC pipe. The outer collar or what ever you want to call it has to fit on the outside of the bottle or PVC pipe. If the pipe isn't thinned down enough it will crack this thin piece of the green cap as I did but it still works. In the third picture you can see it snapped onto the PVC pipe just like it does the bottle. Worth IMG_20160523_23461.jpg IMG_20160523_31882.jpg IMG_20160523_39437.jpg Last edited by Worth1; May 23, 2016 at 03:54 PM. |
|
|

|
|
|
#56 |
|
Tomatovillian™
Join Date: Jan 2014
Location: Tomato Cornhole
Posts: 2,550
|
I'm glad you have time to tinker and get it right.
I've been playing too, I have a dutch bucket hydro system and have a PPM meter so I did some testing. I hope this makes sense I bought some bulk MG, it's blue compared to the green stuff in the bottle and twice as strong. The blue is 24-8-16 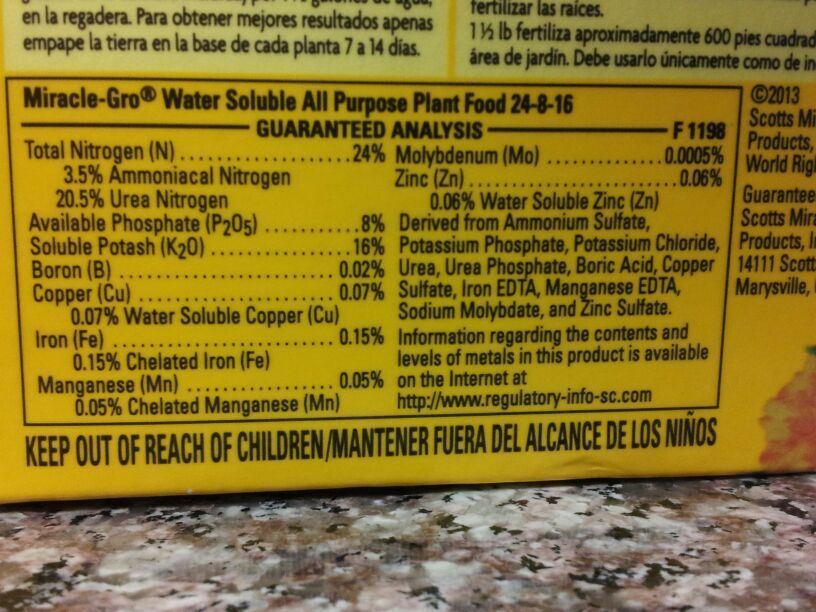 The bottle refills are 12-4-8 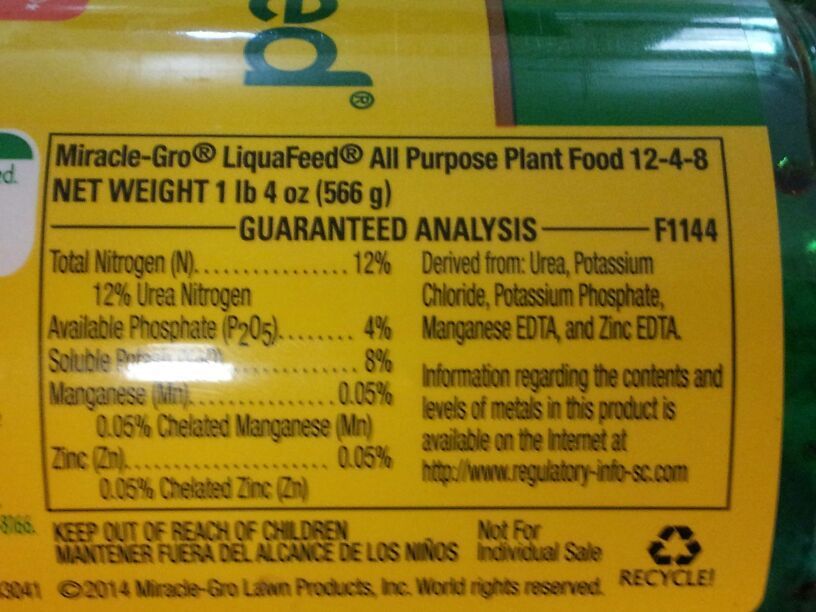 The MG Tomato food is 18-18-21 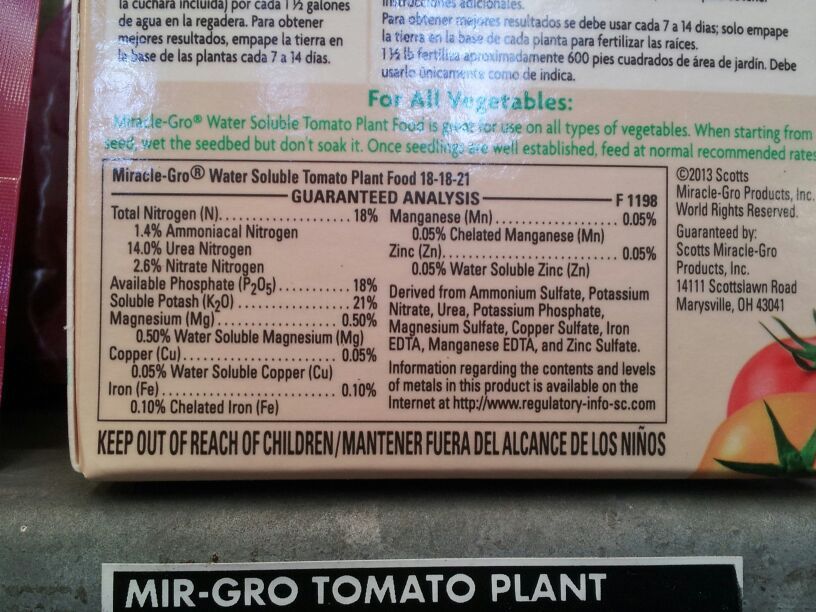 I'm not exactly sure how PPM changes with different strengths but it took 6 tbsp of the blue MG mixed with a little water to reach the 450PPM that matches the prepacked bottle. The instructions on the blue stuff 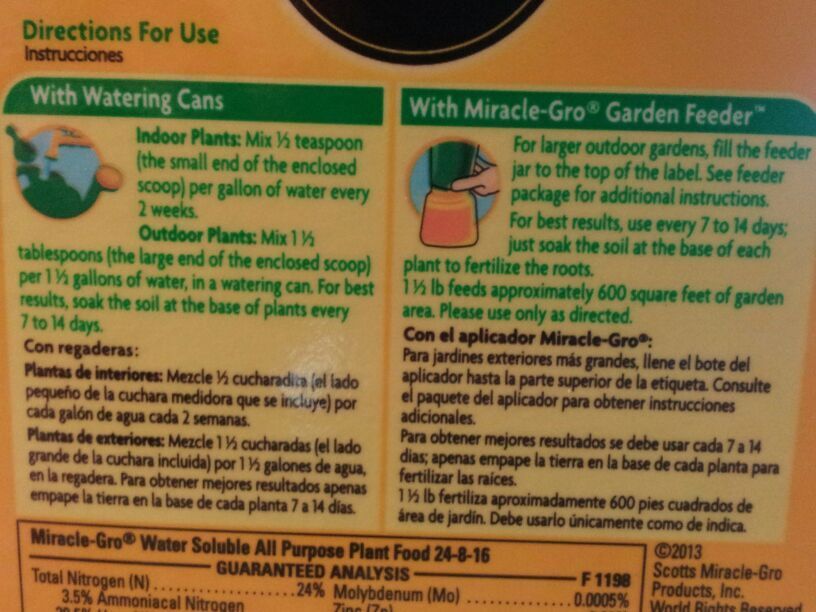 I went out and started testing all the mixed solutions I set up the feeder like directions say for the feeder and tested the supplied bottle and out the hose the PPM is 519 I then mixed a batch of the blue stuff, 1 tbsp-1 gallon of water and it tested 885, this is closer to what my hydroponic mix is but maybe it's too strong for the garden to feed more than once a week because we already have most of the requirements to grow compared to hydroponics soil-less mix but I'm just guessing. I changed the solution in the bottle and ran that home mix of the blue MG I mixed earlier, it was only 186. This should confirm that the fertilizer in the bottles are made from different stuff and I don't have a meter to test so from here I'm winging it. I mixed another 4.5 tbsp and then it tested 265 I added another 4.5 and it went up to 366 That's a total of 15 tbsp to get 366, I'm guessing another 6 tbsp and it would reach the same PPM as the bottle but about half as much as the recommeded mix in the directions. I used 1/2 lb of the 1.5lb box I bought for $5.00, that $1.66 for 40 gallons I haven't been using MG so I can't say if works good mixing it lighter than recommended. I'm sure that most of us amend the soil before planting and that should help to not need a full strength mix as a weekly feeding. I think it'll work great as a light feeding once a week and I'm gonna start off with 10tbsp and see how it goes. Thoughts? Last edited by Rajun Gardener; May 23, 2016 at 08:20 PM. |
|
|

|
|
|
#57 |
|
Tomatovillian™
Join Date: Feb 2006
Location: Den of Drunken Fools
Posts: 38,539
|
Sounds right but I could be confused.
I agree the stuff in the bottle is not just the other stuff mixed. This is why I bored out the orifice to 40 thousands so I could use the 5-1-1 fish fertilizer. Worth |
|
|

|
|
|
#58 |
|
Tomatovillian™
Join Date: Jan 2014
Location: Tomato Cornhole
Posts: 2,550
|
How much of the fish fert will you use? I only want a mild boost from the MG. I've been using Calcium Nitrate and sprinkling about 2 tablespoons around each plant and watering it in about every 2 weeks, they are pretty and full of tomatoes. Here's a pic of my beds, the sun is setting so some pics have a yellow glow. From here the sun is setting to my left and a little behind my back. This is my Mirliton trellis but just added the beds this year. I'm hoping that the Mirlitons will shade the summer heat and get a longer crop from the tomatoes.
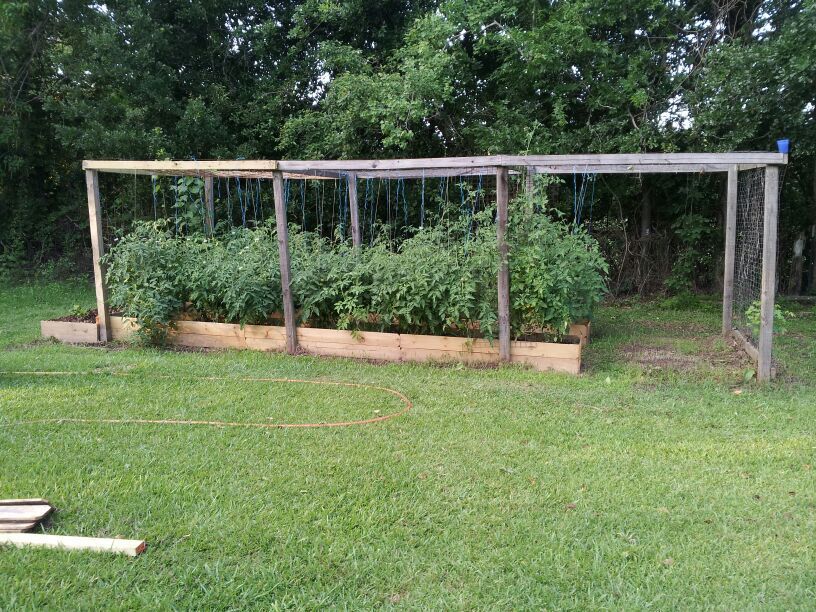 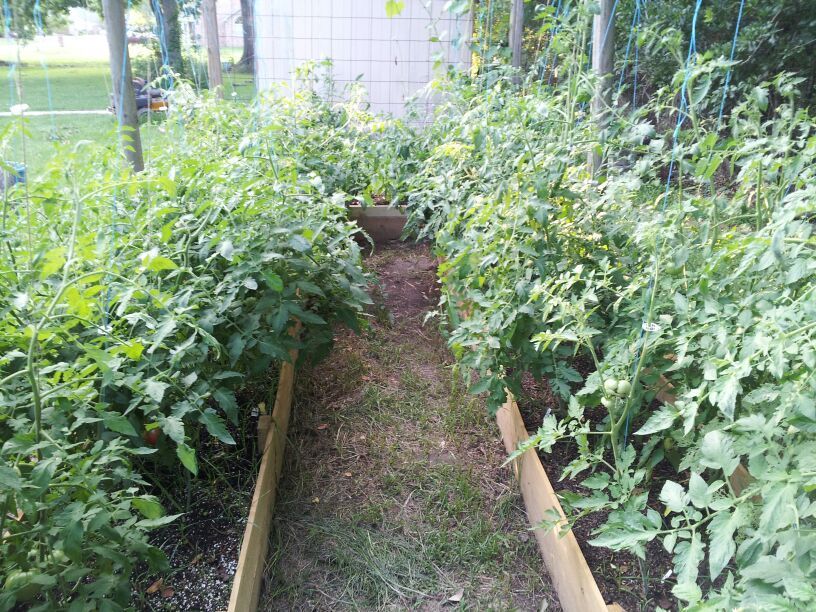 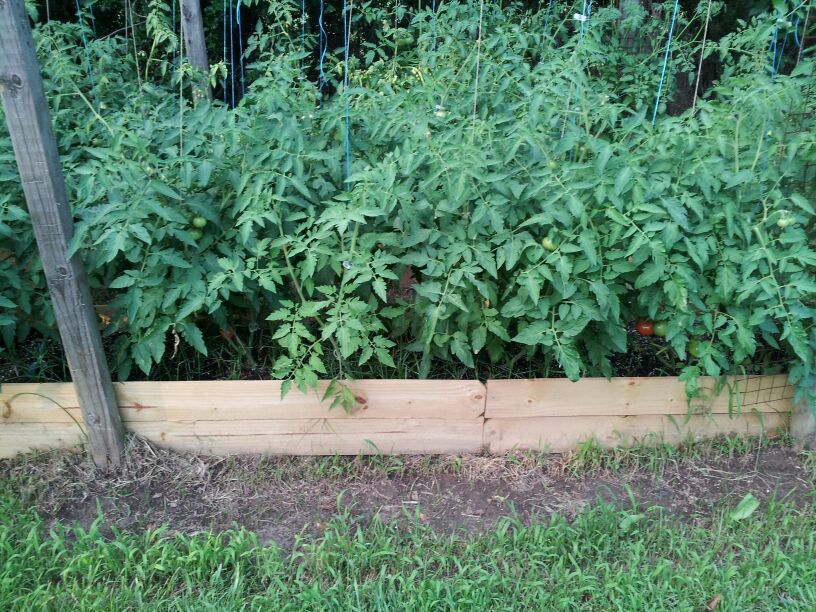 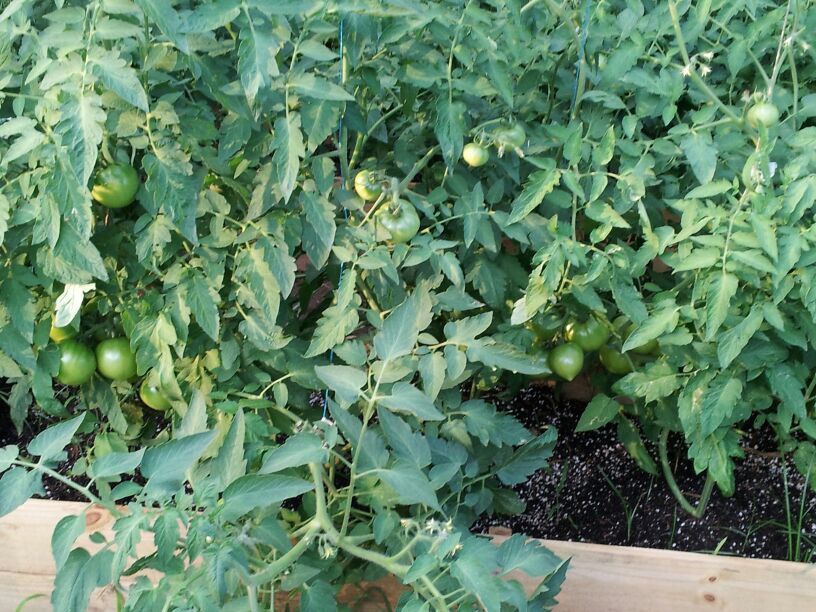
|
|
|

|
|
|
#59 |
|
Tomatovillian™
Join Date: Feb 2006
Location: Den of Drunken Fools
Posts: 38,539
|
Mine came out to about 1 1/2 tablespoons per gallon if I mix the bottle 50/50 water and Fish fertilizer.
This was timing how many gallons a minute the thing put out and then timing how long it took to empty the bottle. Worth |
|
|

|
|
|
#60 | |
|
Tomatovillian™
Join Date: Apr 2016
Location: VA - Zone 7A
Posts: 344
|
Quote:
Can you post some pictures of your new tank setup? |
|
|
|

|
 |
|
|
