
|
Discussion forum for the various methods and structures used for getting an early start on your growing season, extending it for several weeks or even year 'round.
|
 |
|
|
Thread Tools | Display Modes |
|
|
#1 |
|
Tomatovillian™
Join Date: Jul 2015
Location: Lincoln, NE
Posts: 192
|
Currently have a 16 ft x 8 ft raised bed made from railroad ties.
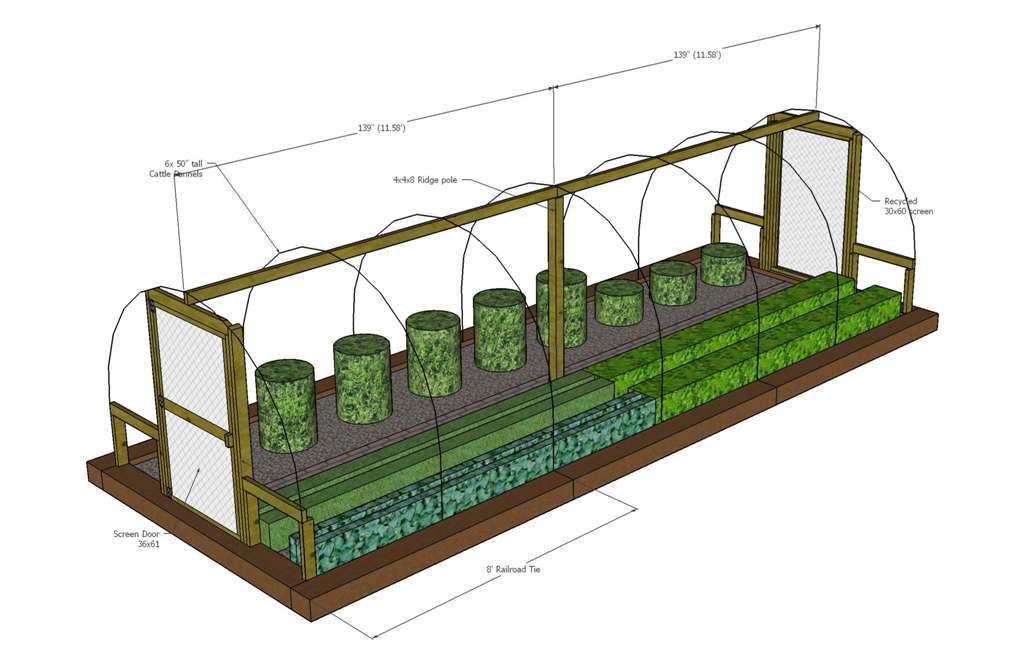
My plan this spring is to expand it another 8 ft, for a total of 24' then enclose it with 16 ft long cattle panels to create a high tunnel. 16 ft panel across an 8 ft. space works out to a max of 5.8 ft of head clearance. The far (back) side will have a 30"x60" screen, the front door is 36"x61". The ridge pole spans are 12', supported in the middle by a 4x4 post. The tall circular plants represent tomatoes, they are spaced 30" apart on-center. My main concerns are: -heat; in Nebr. it gets HOT, often in mid-90's -irrigation; current raised beds are ditch irrigated. The bed slopes from right-to-left which won't work given this design (it would flow across walkway). when/if construction begins, I'll keep this thread updated. 
Last edited by pecker88; December 15, 2015 at 05:31 PM. |
|
|

|
|
|
#2 |
|
Tomatovillian™
Join Date: Apr 2015
Location: under my greenhouse
Posts: 40
|
if you can add 2 bars on the top of the sidewalls and attach your roof plastic to that, then you can have walls that could be raised in hot weather to vent the greenhouse. you can use a net fabric for the walls at that time and you can add some shading if it is still too hot. That would be similar to a chapel design greenhouse, mine is like that, because i have 4 seasons, and without the flexible walls and the rigid roof i would either cook the plants from the heat or have the wind blow it away
|
|
|

|
|
|
#3 |
|
Tomatovillian™
Join Date: Jun 2012
Location: Illinois, zone 6
Posts: 8,407
|
I would be worried about the rough edges of the cattle panels rubbing against my plastic as it flaps in the wind.
For venting, the cheap way to go is sides that roll up, or at least have plastic that can be clipped up to make a side vent. |
|
|

|
|
|
#4 |
|
Tomatovillian™
Join Date: Mar 2015
Location: Bozeman, Montana Zone 6b
Posts: 333
|
Any worries about the RR ties and chemicals affecting your plants?
|
|
|

|
|
|
#5 |
|
Tomatovillian™
Join Date: Feb 2006
Location: Den of Drunken Fools
Posts: 38,539
|
Are you going to try to bend the cow panels?
Worth |
|
|

|
|
|
#6 |
|
Tomatovillian™
Join Date: Jul 2015
Location: Lincoln, NE
Posts: 192
|
@GreenFarmer
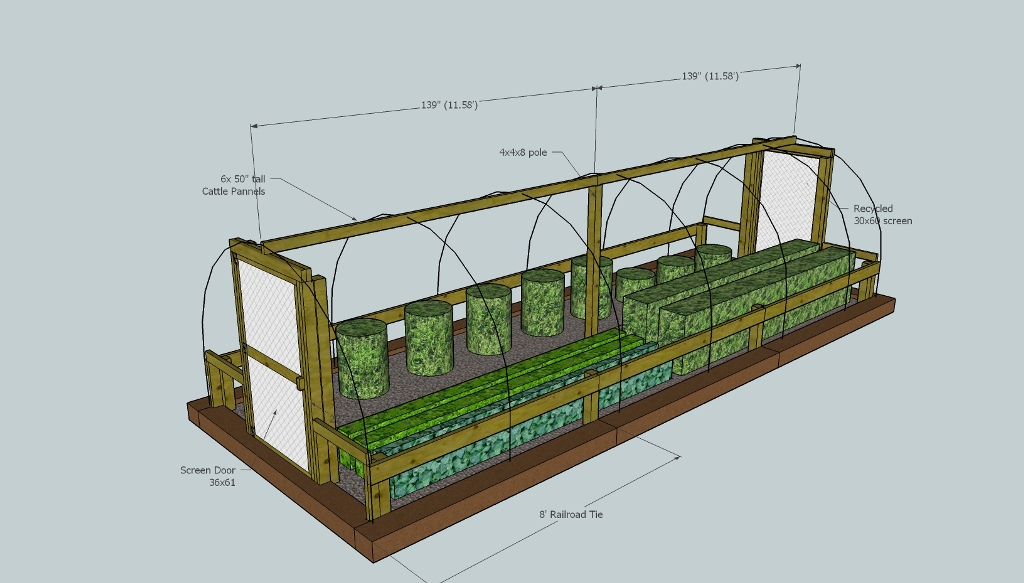
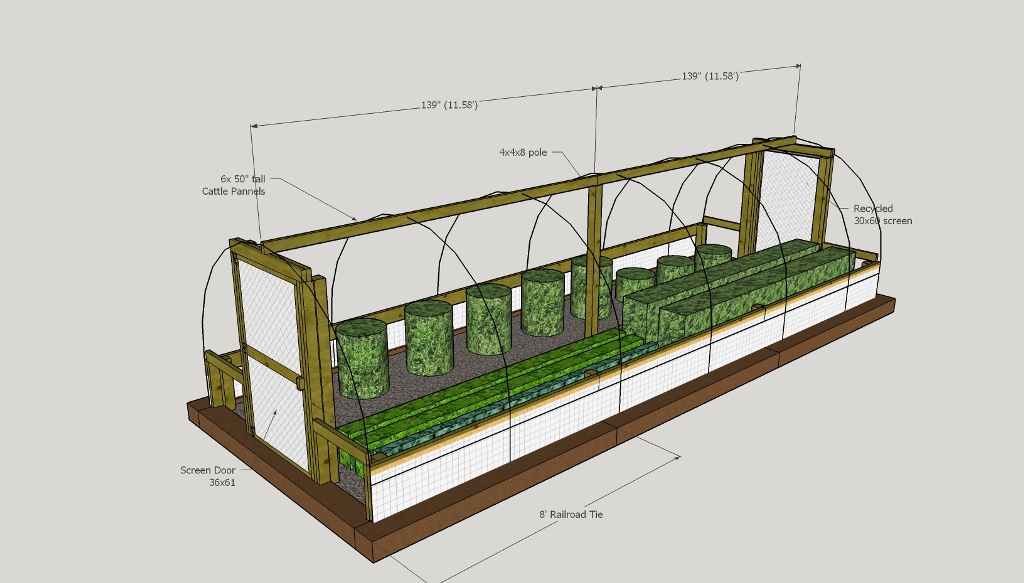
1st pic below is a design that has 4x4 poles just inside the RR ties; 2x6's attached to the 4x4's. The cattle panels still go over the 2x6's and get attached to both the 2x6 and RR ties. I actually like this design better, I think it will help to firm up the entire structure. Wind here is relentless. Plastic would get attached to the 2x6 "knee wall" leaving a "flap" of plastic that runs down to the RR ties. The extra flap could be opened for ventilation. This what you were talking about? @Whoose The RR ties I used were recycled and not brand-new so there wasn't much sticky creosote left. My first 2 yrs of gardening in the raised bed it hasn't been a problem. @Worth1 Yes, I've watched quite a few youtube vids, and it seems pretty easy to bend them into an arch after 1 end is attached. Given my 24' span, I plan on a ridge pole and support beam at 12'.  
|
|
|

|
|
|
#7 |
|
Tomatovillian™
Join Date: Feb 2006
Location: Den of Drunken Fools
Posts: 38,539
|
You know those bamboo curtains they have?
You could do the same thing with a long joint of PVC pipe attach the bottom of the plastic to the bottom all they way down. You would be able to roll the whole side up at once. 1 1/2 half would work great. The ends of the pipe could stick out more on each end and you would be able to hook then where you wanted. Put a cap on the ends to keep the wasps from building nests in them. Worth |
|
|

|
|
|
#8 |
|
Tomatovillian™
Join Date: Feb 2006
Location: North GA
Posts: 530
|
I have built 3 of the cattle panel greenhouses over the past few years.
I do not have as much wind as you, so I haven't needed to use a center purlin reinforcement. I just bent over the cattle panels and secured to the wood baseboards. For some reinforcement, I overlapped each cattle panel about 3 inches and secured with zip ties. To cole_robbies point, secure the plastic as tight as possible. Also, make sure the smoother side of the panels are facing outward (for less damage to the plastic). I have found the limited height to be a challenge. With the apex at 5 foot 8 inches, I have gashed my head a few times when walking through. I ended up raising my entire tunnel a few inches by adding a second set of wood base supports (the railroad ties in your case) on top of the first set. I made the top row a little narrower than the bottom row so that the bottom of the panels would sit on top of the bottom row and push into the side of the top row. (A picture would serve better, I'll see if I can find one.) The other question about height is that if 5'8 is the apex, then your plants cannot get very tall before they 'hit the ceiling'. Not sure what your plans are for growing. I use my houses for growing shorter varieties and dwarfs. I combat the heat by using shade cloth and/or running cheap fans on a timer. Good luck. Bill |
|
|

|
|
|
#9 | |
|
Tomatovillian™
Join Date: Jul 2015
Location: Lincoln, NE
Posts: 192
|
Quote:
I'd have to re-run the model with the edit, but I would gain about 6" of headroom, up to about 6 ft. Probably just grow determinate toms, there are tons of varieties out there. |
|
|
|

|
|
|
#10 |
|
Tomatovillian™
Join Date: Jun 2012
Location: Illinois, zone 6
Posts: 8,407
|
Just build some side walls to raise everything up. If you orient the structure east-west, your north wall need not be clear. If you build a 4-6' tall wall in the back and a 1-2' wall on the south side, you would add a lot of head room.
|
|
|

|
|
|
#11 | |
|
Tomatovillian™
Join Date: Jul 2015
Location: Lincoln, NE
Posts: 192
|
Quote:
Yep, current 16'x8' bed is running East/West. I'll revise drawing and re-post later. |
|
|
|

|
|
|
#12 |
|
Tomatovillian™
Join Date: Apr 2015
Location: under my greenhouse
Posts: 40
|
i think that the 2x6 "knee wall" that can be opened is similar to what i am tlking about, only, my walls are about 7ft high that i can walk in when they are open. in the middle of the house at the highest point of the arch, it is about 8.5 ft, and i find that to be limiting. a great idea is to spray white lime stuff used in construction in mid summer, a cheap effective way for shading, and cleans off alone when it's rainy and cold
|
|
|

|
|
|
#13 |
|
Tomatovillian™
Join Date: Jul 2015
Location: Lincoln, NE
Posts: 192
|
version 3 below.
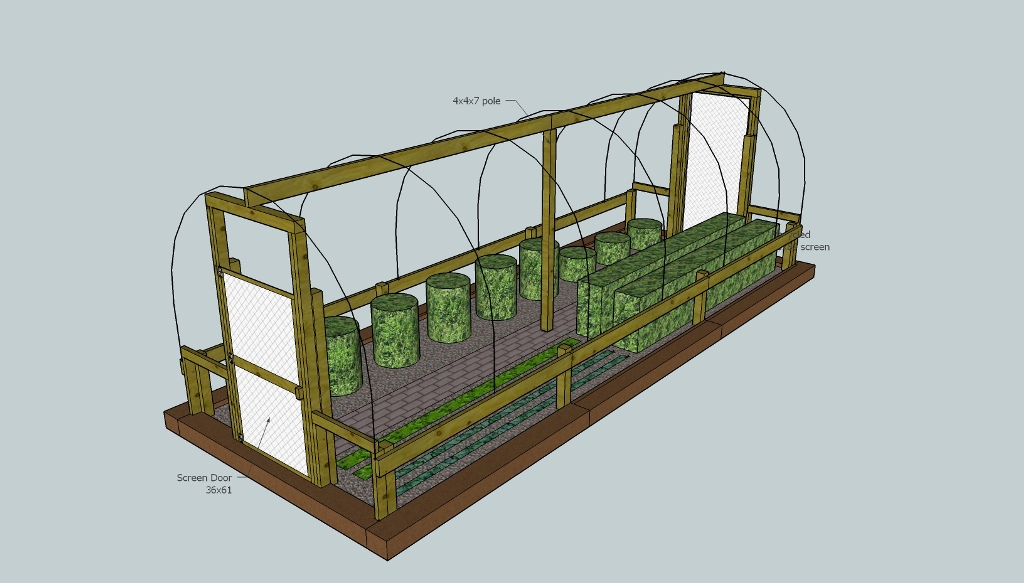
-4x4 post around inside perimeter of RR ties are now 24" above the soil surface. -Horizontal 2x6 are set down 1.5" from top of 4x4 posts -Bend cattle panels sit on top of the horizontal 2x6 -Comes out to 7.4 ft of head clearance -changed the ridge pole to be 2x6, span is still 12 ft -changed header above each end door to be 4x4 Questions: 1. how should I anchor the 2 ft 4x4 posts around the perimeter? Anchors or traditional sonotube/concrete footings with 4x4 bracket on top? 2. I have a 6ft 4x4 on the inside of each end door, just as something to fasten the vertical door jam to. Any other recomendations on how to support the vertical 2x4's on the ends? My thought is that keeping the hoop house support on the inside of the RR ties and independent from the RR ties, will allow for easy replacement of them when they rot out. I.e. not having to lug them inside the hoop house, or unfasten any major structural components. I struggle bridging 3D design to reality, much more experience with the former. thanks. 
Last edited by pecker88; December 18, 2015 at 11:17 AM. |
|
|

|
|
|
#14 |
|
Tomatovillian™
Join Date: Mar 2014
Location: Greenville, South Carolina
Posts: 3,099
|
I made my hoop house 6.5 feet high and I am re-doing it now because it is annoying to have to crouch near the sides. I am now making it 8.5 feet which will allow me to put my plants all the way against the sides without the curve of the hoops interfering or having to crouch. My advice, if you can make it taller w/o much trouble, do it. I dont get much bad weather here but I made mine strong enough to make it through anything. I need to take some pics and post a little how to guide but time is short and many other things to do.
In short the first and last hoop are 1 inch PVC for the rest I used 20ft sections of rebar covered with black plastic water pipe as my hoops. Drove 5ft sections of 1' conduit 2 ft into the ground leaving 3ft for a hip board to attach to. The conduit was secured further at my base 2x6's with metal U-clamps. The hoops slide 12 inches into the conduit. I used 1/2 inch conduit as ridge poles and also 3ft down from center on each side, secured with metal hose clamps and zip ties. I had to make the first and last hoop PVC so I would have something to attach the end walls to. After doing all this i think i probably should have just used 1 inch PVC for the whole thing but hindsight is 20/20. Good luck! |
|
|

|
|
|
#15 |
|
Tomatovillian™
Join Date: Feb 2006
Location: Den of Drunken Fools
Posts: 38,539
|
One thing you can think about is to make the thing with Gothic arches.
Much more practical than the Gomer Pyle USMC quonset hut. Worth |
|
|

|
 |
|
|
