
|
Member discussion regarding the methods, varieties and merits of growing tomatoes.
|
 |
|
|
Thread Tools | Display Modes |
|
|
#16 |
|
Tomatovillian™
Join Date: Sep 2009
Location: Alabama
Posts: 7,068
|
As someone who has used raised beds for nearly 40 years I have learned a few things. One is to make your path wide enough for a wheelbarrow so you can easily fill the beds without so much shoveling and toting. Four ft width was just a tad too wide for me and I have long arms and am about 6' tall and now that I'm 67 years old the 4 ft width is even more of a problem. I recently had to remake one of my beds and ended up just shrinking it a bit in width. I also went from 8" X 2" treated lumber to 10" X 2" and I find it a little easier to work in. If you are not as tall or have trouble reaching out I would recommend making the beds about 44 to 46 inches wide on the outside dimension which would leave you a bit more than 40 inches to work with.
To hold the beds in place the easiest thing I have found is to just drive in a two foot piece of 3/4" metal conduit straight down beside the outside of the bed and attach it with a U clamp with 1 5/8" self tapping coated screws and to put the ends together just use 3" self tapping coated screws. It only takes 3 for each corner and it makes the finished bed really neat. You also might want to use a level to give the beds at least an even start when setting them up. I didn't do this on my first attempt and regretted it though it wasn't catastrophic it did make things a bit more difficult. As I have rebuilt the beds I have attempted to make them more level and it has worked better even though it is a bit more work. It doesn't have to be perfect but it does help to have them somewhat level. If you can do it I recommend you use as long a bed as you can get away with in your space. I have beds from 40' long to 10' long. My favorite beds to use are the longer beds. If you go with the longer beds then you can join the boards together by using a two foot piece of treated 1 X 6 and screwing it to the outside with 1 5/8" screws to hold the joining together and then drive in a piece of conduit and attach it to the joint to keep it straight. If you do make longer beds then it is best to support the sides about every 5 ft along the outside with the conduit because over time boards will warp and move and this keeps them fairly straight and stops too much shifting. If you don't want longer beds or they won't work in your space then I recommend going with the longest possible standard size of 2"X10" treated lumber and before you buy the boards check them for straightness and try to pick out some with fewer knots. I first started using raised beds just by mounding them up and mulching the sides but the number of problems I encountered quickly made me decide to go with bordered beds. At times of heavy rain I would have erosion affect some of the beds particularly down at the bottom of the garden. The amount of mulch needed to keep the weeds at a reasonable level was a constant struggle to maintain enough mulch to do the job. The beds were constantly sinking and needing more mounding and I was always messing up the sides trying to work the center. It is a lot of time and effort to build and fill the beds but once you have it done the maintenance and ease of use will amaze you. It will also make it so much easier as you get older. I can't imagine doing the back breaking work I used to do before I had the raised beds now that I am much more impaired with age. Good luck with whatever you decide and good gardening. Bill |
|
|

|
|
|
#17 | |
|
Tomatovillian™
Join Date: Feb 2016
Location: Southeastern PA
Posts: 1,420
|
Quote:
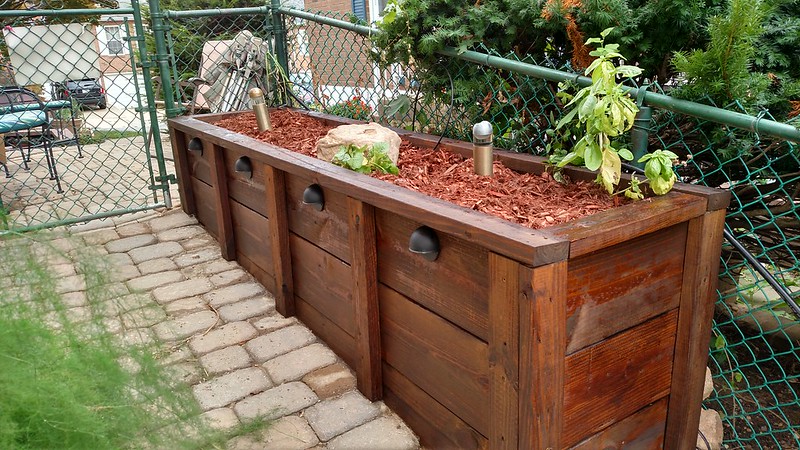
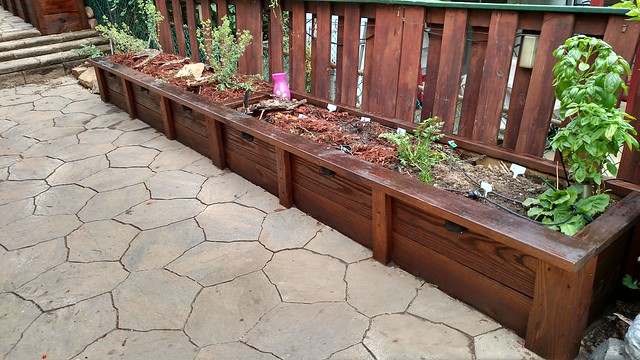
Here's a different picture. |
|
|
|

|
|
|
#18 |
|
Tomatovillian™
Join Date: Dec 2016
Location: Pittsburgh, PA
Posts: 3,194
|
Well, that is gorgeous.
Nan |
|
|

|
|
|
#19 |
|
Tomatovillian™
Join Date: Feb 2006
Location: MS
Posts: 1,523
|
I'd add to what b54red said by mentioning that I don't have a weed or erosion problem because I use black plastic on everything. Without plastic, I seem to spend more time weeding than picking tomatoes, so I use plastic on everything. I've tried lots of things other than plastic, but the plastic is the only thing that really works well for me.
Last year, half of my commercial beds were 96 feet long and 5 feet wide (8 pieces of treated 2 x 12 x 12 long) using a wood frame, and the other half were the same size, but without a wood frame. There wasn't a noticeable difference in production. I have tried many widths, but for me, the 5 foot width works best. A 4 foot width just seems a little too cramped to me. The plants have a little more room with 5 feet, and I can still reach the tomatoes in the center, 2.5 feet inside. I can't reach them easily on a 6 foot width, so the 5 still works best for me. I've tried all kinds of spacings for the pathways, too. The 5 foot works well for me. Six foot is even better. When the plants bush out, there can be a foot of foliage over the edge, so by the time you subtract one foot from each side, that only leave a clear path of 3 feet down the center. However, on the commercial beds I have paths 10 feet wide because we use a tractor and truck at planting time, and also to spray the plants in the summer, and we need a trailer or truck to put the picked tomatoes in. I'm blessed to have the room to do this, but on my old beds that we worked by hand, a 5 or 6 walkway was best for me. I'm going to try more raised beds without wood frames this year. They work fine is you cover them with black plastic and secure the plastic all the way around. This gives you stability of the bed, holds moisture longer, and makes your bed virtually weed free. I'm going to try more beds without the frames because we can't use a tractor on raised beds the height of mine, which is about 11.5 inches. We have an attachment that goes on a tractor that is a locally made sub-soiler. It will go down over 12 inches and break up the ground very well at that depth. We can run that up and down the frameless bed, but our tractor won't straddle the bed with enough clearance otherwise. Running a gas walk-behind or a tractor tiller doesn't go down deep enough, and it takes far too long trying to loosen the deep soil on as much room in beds as I have. I'm sure this isn't for everyone, but it is what works for me now that I'm growing several hundred plants. But I am confident that if you will use black plastic on even the smallest size tomato garden that you will conserve moisture, eliminate virtually all of your weed trouble, cut your work load down to a fraction of the time, and the plastic will hold your bed in shape and prevent erosion. Be sure to put a drip irrigation line underneath the plastic and the whole operation become very automated and much easier to handle. Here is my Facebook site that shows pictures of a lot of things I mentioned here: https://www.facebook.com/Home-Grown-...9172131302064/
__________________
Zone 7B, N. MS |
|
|

|
|
|
#20 |
|
Tomatovillian™
Join Date: May 2007
Location: Indiana
Posts: 48
|
I would like to thank everyone for taking the time to give advice and such. It is truly appreciated.
I am leaning toward 8" bed height to give me some room for amendments. Its spring break next week so I can get a few finished now. Thanks again. |
|
|

|
|
|
#21 |
|
Tomatovillian™
Join Date: Jul 2015
Location: Mississippi
Posts: 166
|
One thing I would add: Make sure that your beds are level. If your beds are on a slight slope and you simply follow the terrain, rain and irrigation water will pond at the low point inside your bed. And it will wash your soil into the low point and over the edge of your bed.
Ask me how I know . . . |
|
|

|
|
|
#22 |
|
Tomatovillian™
Join Date: Jan 2018
Location: Philly 7A
Posts: 739
|
My beds are about 20" high with a 6" cap board for my butt when I'm gardening"
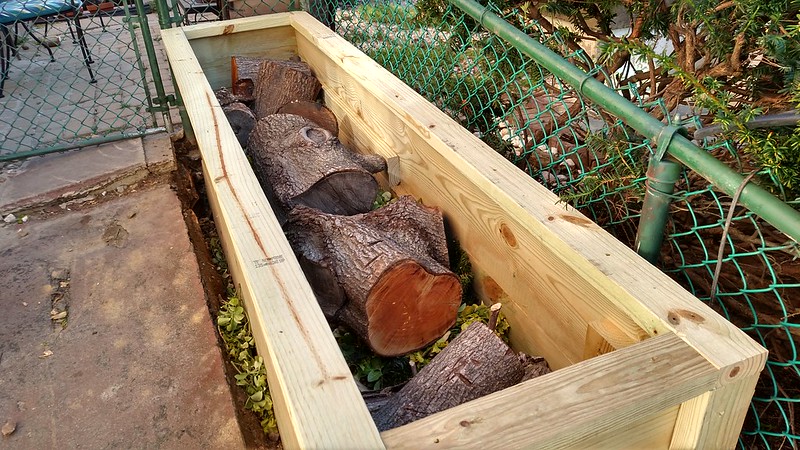
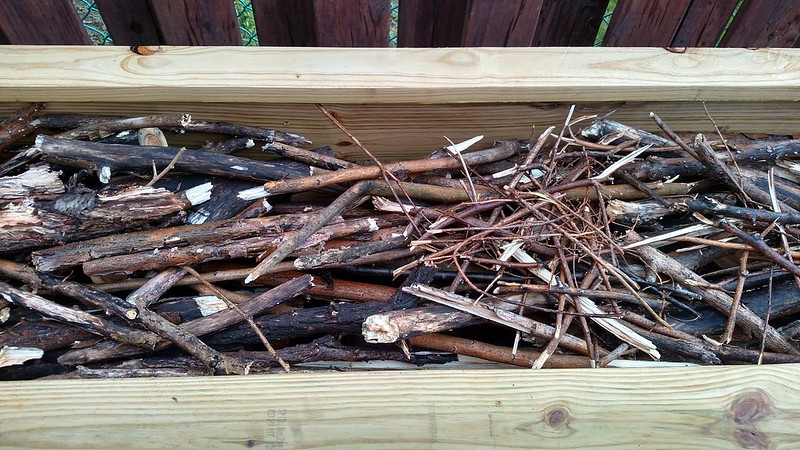
Filling is no problem using yard waste, if you have trees around, I made my beds Hugelkultur beds Your wallet wont appreciate the height but your back and knees will.    . 
|
|
|

|
 |
|
|
